Exercise 6.4: Suspending and Deleting User Accounts

In this exercise you will learn how to suspend and delete user accounts.

Overview

Administrators may need to suspend or delete accounts.
Suspending a user account
Allows you to block users from accessing IBM SmartCloud™ for Social Business services. For example, when an employee is on a leave of absence from the company you might want to temporarily deny all access for that user.
Deleting a user account
Permanently removes the account. When you delete a user account, you have the option of assigning data from their collaboration account to another user. You may want to delete a user when they have left the company and assign their shared files and other collaboration assets for future use and reference.

Objectives

After completing this exercise, you should be able to:

Glossary

Term Definition
Deleting an account Deleting an account permanently removes the account from the organization directory. The deletion does not take effect until the user logs out.
Suspending an account Suspending an account prevents users from accessing services. Other users cannot send mail to suspended accounts. The suspension does not take effect until the user logs out.

Procedure A: Suspending and Unsuspending a user

Step
Action
1
Log in and navigate to the Administration panel. For detailed steps, see the procedure document: Accessing the Administration Panel.
2
From the navigation pane, click User Accounts.
The User Accounts link.
3
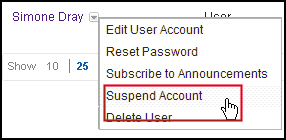
To suspend, click the arrow next to the user account and select Suspend Account.
The Suspend Account option is highlighted in the user popup menu.
4
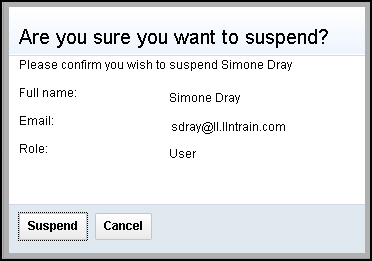
On the confirmation dialog, click Suspend.
The Suspend Confirmation dialog displays the user name, email and role.
5
On the User Accounts page, confirm the user status is Suspended.
The status of the user is shown as Suspended.
6
To unsuspend, click the arrow next to the user account and select Unsuspend Account.
The Unsuspend Account option is highlighted in the user popup menu.
7
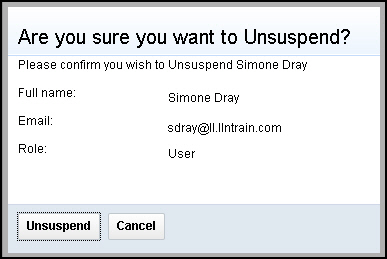
On the confirmation dialog, click Unsuspend.
The Unsuspend Confirmation dialog displays the user name, email and role.
8
Confirm the user status is Active.
The status of the user is shown as Active.

What happens when a user is suspended?

When a user's account is suspended:
  • The user will not appear on the Company Directory page.
  • Contact invitations from the user can be accepted.
  • If already a contact, the user will still appear as a contact.
  • The user's Profile page will not be displayed. (requires Engage or Connections).
    The missing Profile message is displayed as: "The page that you are trying to view does not exist."
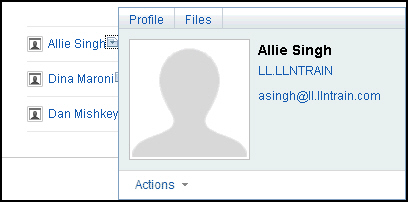
  • The user's Business Card will be displayed. (requires Engage or Connections).
    A user's Business Card is displayed.
  • The user's Files will be displayed. (requires Engage or Connections).
  • The user can be added to Activities. (requires Engage or Connections).
  • The user's mail subscription is still recognized as being "in use" by SmartCloud iNotes®, and is not made available for use by another user.
    A warning message is displayed when attempting to create a new user using an existing iNotes email address.
  • If someone attempts to send the user an e-mail while they are in a suspended status, the sender will receive a delivery failure indicating that the user account is not active.
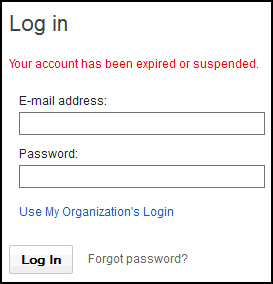
  • If the user attempts to log in to the service through a Web browser, the user will receive a message indicating that the account is suspended.
    The denied login message is displayed as: "Your account has been expired or suspended."

Procedure C: Deleting a user

Step
Action
1
Log in and navigate to the Administration panel if you are not already there. For detailed steps, see the procedure document: Accessing the Administration Panel.
2
From the navigation pane, click User Accounts.
The User Accounts link.
3
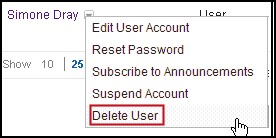
To delete, click the arrow next to the user account and select Delete User.
The Delete User option is highlighted in the user popup menu.
4
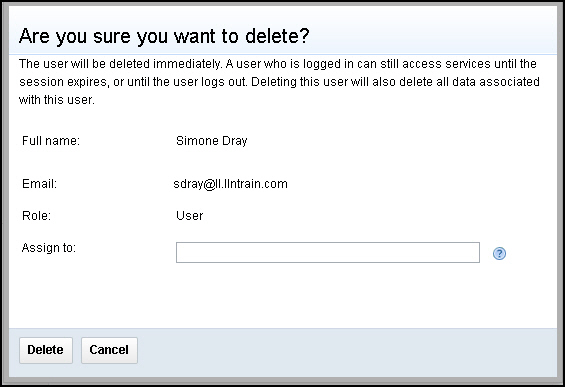
On the confirmation dialog, select the delete option.
Option 1: Delete without file transfer
This option will delete the user account and all their associated mail and collaboration assets.

To do this, click Delete.

Option 2: Delete account with file transfer
This option will delete the user account and associated mail assets. Collaboration assets will be assigned to the designated user.

To do this, in the Assign to field enter the e-mail address of a person in your company and click Delete.

The Delete Confirmation dialog displays the user name, email and role.

5
Verify the user is no longer listed on the User Accounts page.

Resources