Exercise 4.2: Changing the theme and adding your logo to the navigation bar

In this exercise you will learn how to change the theme and logo for your organization.

Overview

To customize the user experience for your SmartCloud for Social Business users, you can change the theme for your organization. You can also configure SmartCloud for Social Business to display your organization's logo in the navigation bar.

Objectives

After completing this exercise, you should be able to:

Procedure A: Changing the theme for your company

Step
Action
1
Log in and navigate to the Administration panel. For detailed steps, see the procedure document: Accessing the Administration Panel.
2
From the navigation pane, click Theme.
Click Theme in the System Settings section of the Administration panel.
Tip: An alternate way to navigate to the Theme page is to click on your organization's name, either in the navigation banner at the top of the page, or from your Dashboard.
  • Navigation banner:
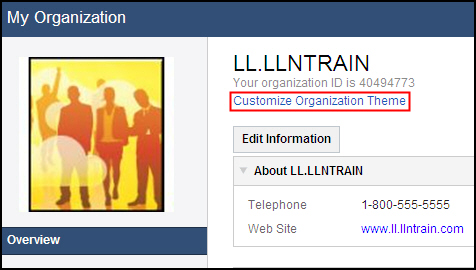
    Click your organization's name in the black banner at the top of the page.
  • Dashboard:
    Click your organization's name, which displays below your name on your dashboard.
Then, on your organization's page, click Customize Organization Theme.
Click Customize company theme.
3
To change the color scheme for your company, click the Change link on the Color Scheme row.
Click the change link on the Color Scheme row.
4
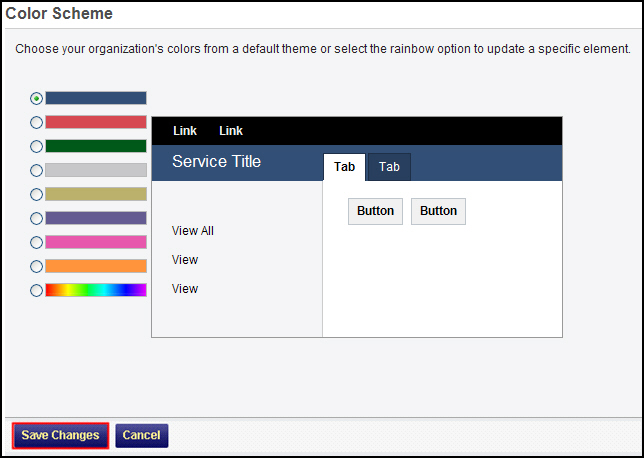
Select one of the pre-designed color schemes, and skip to Step 7, or select the multi-colored bar to design your own color scheme. If you select one of the pre-designed color schemes, a preview of that color scheme will display in the picture on page.
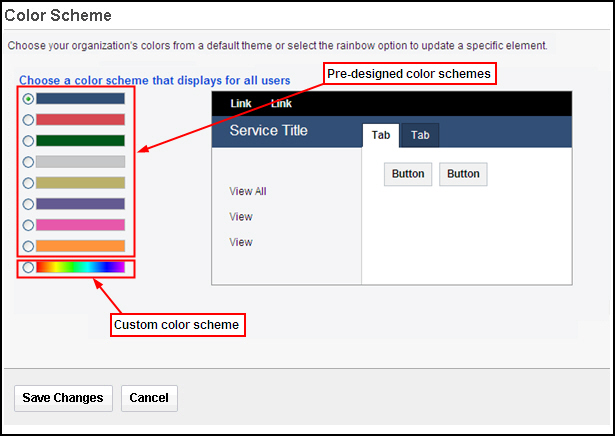
Pick one of the pre-designed color schemes, or click the last option in the list to create a custom color scheme.
5
If you chose to design a custom color scheme, you will be prompted to select the colors for your scheme from a palette. To set the colors, first select the box for the element, and then select the color you would like to set for that element from the palette. When you select a color, the hexadecimal value for that color will be entered into the box.
Attention: Manually entering in the hexadecimal values for the colors is not recommended. Use the palette to set the colors.
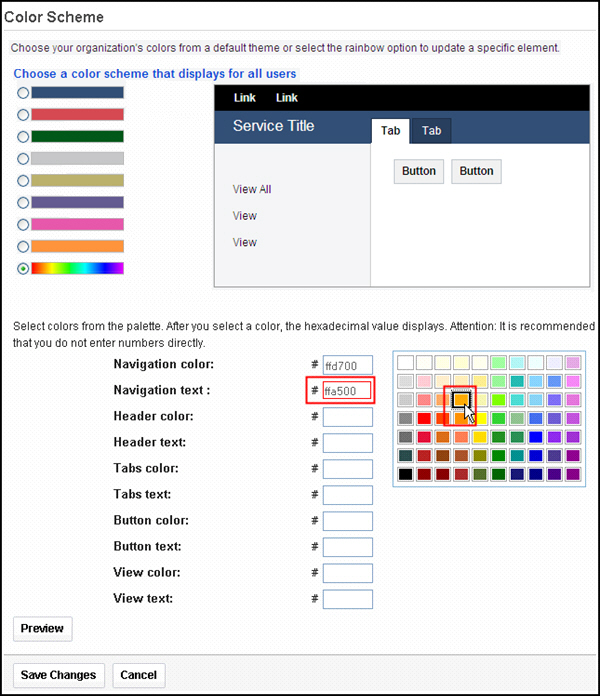
Select an element, and then select the color for that element from the color palette.
6
After you have selected all of the colors, click the Preview button to update the image.
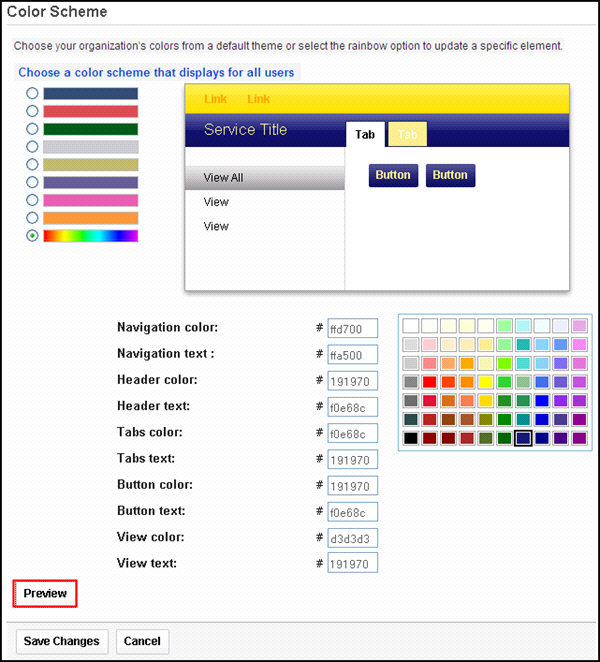
Click the preview button to preview your color scheme.
Tip: You must have a color selected for each element before clicking Preview, or else the preview picture will not update.
7
If you want to apply the changes that you see in the preview to your entire organization, click Save Changes.
CAUTION:
Remember that these changes will be made to the user interface for everyone in your organization.
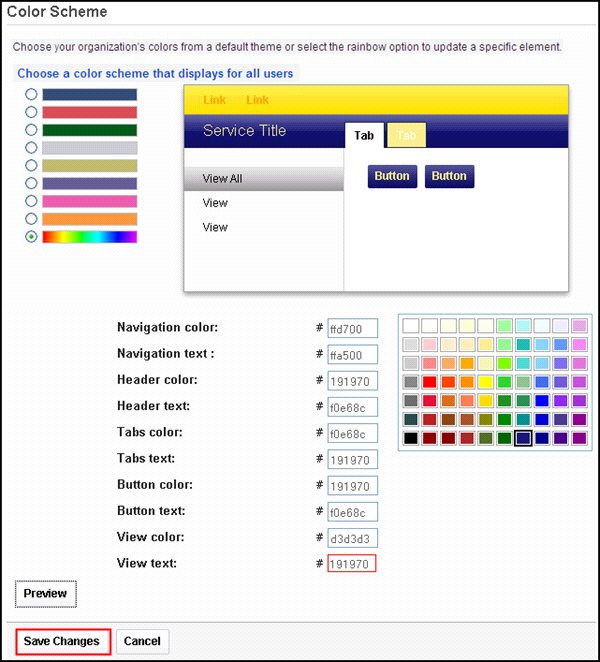
Click the save changes button to apply the changes to your entire company.
8
You should receive a message that the theme was applied successfully.
Custom theme
The custom theme was created successfully.
Pre-designed theme
The company theme was updated successfully.
9
Log out, and close your browser. Re-open your browser and log back in. You should now see the changes to the theme.

Procedure B: Changing the Logo for your organization

Step
Action
1
Log in and navigate to the Administration panel if you are not already there. For detailed steps, see the procedure document: Accessing the Administration Panel.
2
From the navigation pane, click Theme.
Click Theme in the System Settings section of the Administration panel.
Tip: An alternate way to navigate to the Theme page is to click on your organization's name, either in the navigation banner at the top of the page, or from your Dashboard.
  • Navigation banner:
    Click your company's name in the black banner at the top of the page.
  • Dashboard:
    Click your company's name, which displays below your name on your dashboard.
Then, on your company's page, click Customize Organization Theme.
Click Customize company theme.
3
To change the color scheme for your organization, click the change link on the Logo row.
Click the change link on the logo row.
4
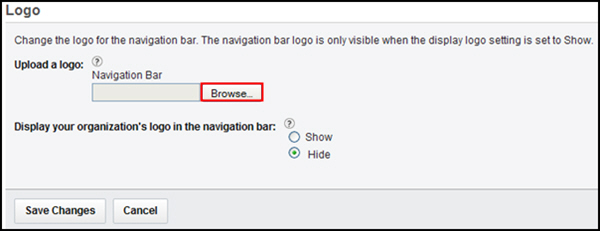
Click the Browse button.
5
Navigate to an image file that meets the criteria, and click Open.
Tip: You can upload the following image formats: JPG, JPEG, GIF, or PNG. The maximum image size is 30KB.
Navigate to the logo image file, select it, and click Open.
6
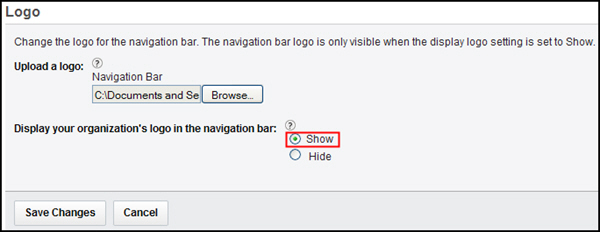
If the Display Logo option is currently set to Hide, you must change this setting to show the logo in the navigation bar for all users in your company. Set the Display Logo field to Show.
Click the change link on the Display Logo row.
7
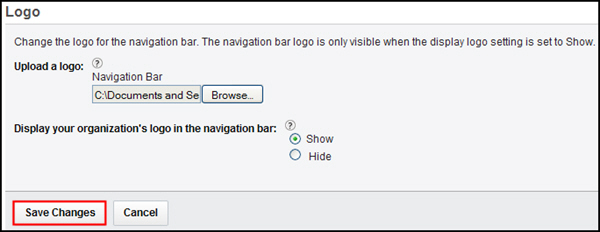
Click Save Changes.
Set Display Logo to Show, and then click the Save Changes button.
8
The logo will now display on the navigation bar for all users in your organization. Refresh your browser to see the change.
The logo displays on the navigation bar for all users.
9
If you later want to prevent the logo from the navigation bar, you can hide the logo for all users. Click the change link on the Logo row.
Click the change link on the Display Logo row.
10
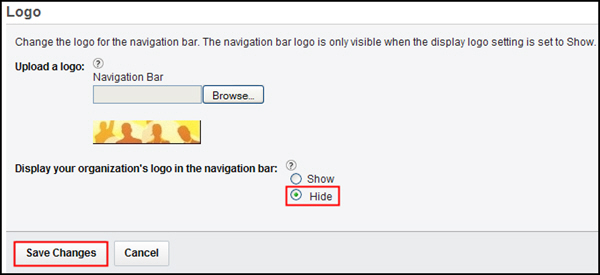
Set the Display Logo field to Hide, and then click Save Changes.
Set Display Logo to Hide, and then click the Save Changes button.
11
Refresh your browser to see the change.

Troubleshooting

Problem Resolution
How do I set my organization's theme back to the default colors? Set the color scheme to the first pre-defined color scheme:
Choose the first color option in the list, and click the Save Changes button.
I set a logo for my organization, but it is not displaying in the navigation bar. You must have the Display Logo setting set to Show for your logo to display in the navigation bar.

Refer to Steps 7 and 8 in Procedure B of this exercise to set the logo to show.

I'm attempting to create a custom color scheme. When I click the Preview button to view the colors that I have configured, nothing happens. You must have a color selected for each element before clicking Preview, or else the preview picture will not update.
I refreshed my browser, but I'm not seeing the changes that I made to the theme. Log out, and close your browser. Re-open your browser and log back in. You should now see the changes to the theme.

All users will need to take these steps to see the changes to the theme.

Resources