OLAP Spreadsheet Add-in User's Guide for 1-2-3
Before you begin the advanced tutorial, complete the
steps in the next two sections, Connecting to a Database and Setting Hyperion Essbase Options. In addition, be sure to read Following Guidelines During the Tutorial and Reviewing the Sample Basic Database for
important information about what you should expect as you perform the tutorial
steps.
To access Hyperion Essbase data for the advanced tutorial, first connect to
the Sample Basic database on the server. This tutorial assumes that you
have the appropriate privileges to connect to a server, an application, and a
database.
- Select Essbase > Connect.
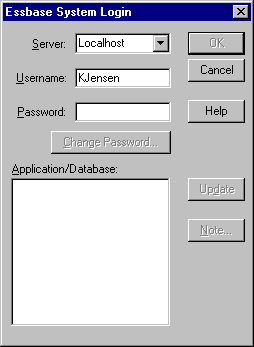
Hyperion Essbase displays the Essbase System Login dialog
box.
Figure 83. Essbase System Login Dialog Box
| Note: | To complete the steps that follow, you need to know the name of the Hyperion
Essbase server, your username, and your password. If you do not have
this information, contact the Hyperion Essbase system administrator.
|
- From the Server list box, select the server that you want to
access. (If the server name that you want is not shown in the list,
type the name of the server that you want to access.)
- To move to the Username text box, press Tab and then, in the
Username text box, type your username.
- To move to the Password text box, press Tab, and then, in the
Password text box, type your password.
- To connect to the server, click OK.
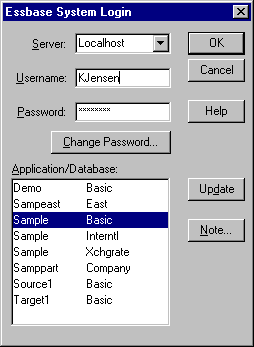
Hyperion Essbase displays a list of available application/database pairs in
the list box. A Hyperion Essbase server allows simultaneous access to
multiple applications. An application can contain multiple
databases. Only the databases to which you have security access appear
in the list.
For this tutorial, you use the Sample Basic database. If the Sample
Basic database was installed as part of the Hyperion Essbase installation, it
is shown in the list. If Sample Basic is not shown in the
Application/Database list, ask the Hyperion Essbase system
administrator to install it.
Figure 84. Available Application and Database Pairs
- In the Application/Database list, double-click Sample Basic,
or, from the Application/Database list select Sample Basic and then
click OK.
If the application is not already running, Hyperion Essbase automatically
starts it. There may be a brief pause as the application loads;
the time required to start an application depends on the number of databases,
the sizes of the databases, and the sizes of the indexes of the databases that
are contained within the applications.
Before you begin the tutorial, make sure that the
worksheet options are set to the initial settings shown in the figures in this
section.
| Note: | For information on each option in the Essbase Options dialog box, see the
Hyperion Essbase Spreadsheet Add-in online help.
|
- Select Essbase > Options.
- In the Essbase Options dialog box, select the
Display tab.
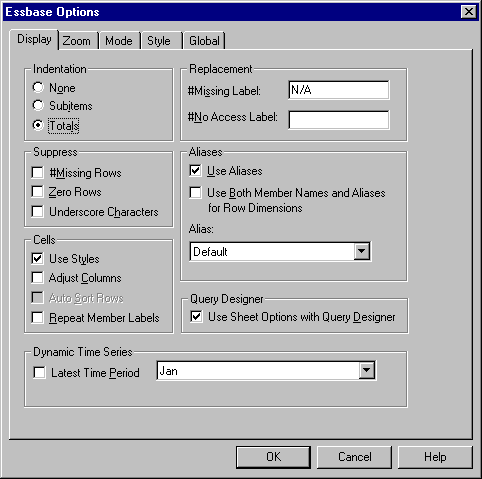
- Select the appropriate check boxes and option buttons so that your display
matches Figure 85.
Figure 85. Initial Settings for Display Options
- Select the Zoom tab.
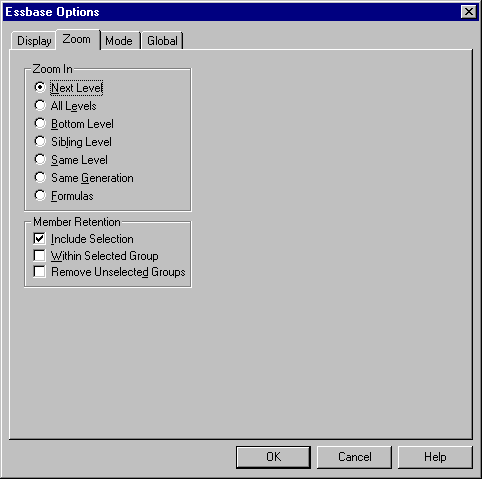
- Select the appropriate check boxes and option buttons so that your display
matches Figure 86.
Figure 86. Initial Settings for Zoom Options
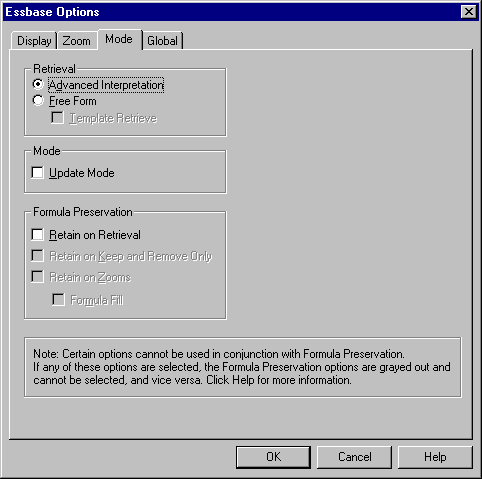
- Select the Mode tab.
- Select the appropriate check boxes and option buttons so that your display
matches Figure 87.
Figure 87. Initial Settings for Mode Options
- Skip the Style tab.
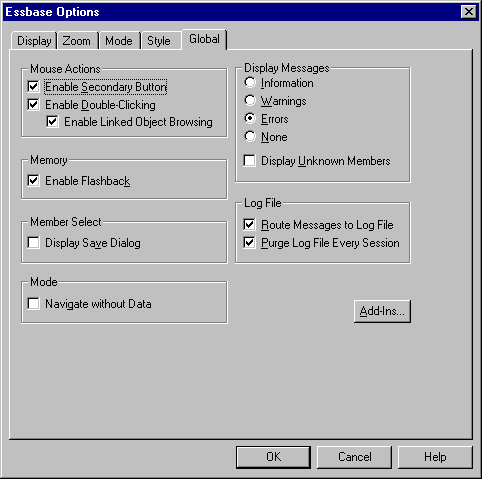
- Select the Global tab.
- Select the appropriate check boxes and option buttons so that your display
matches Figure 88.
Figure 88. Initial Settings for Global Options
- To save the settings for this session and close the Essbase
Options dialog box, select OK.
| Note: | The settings in the Essbase Options dialog box may change as you access the
various sample Lotus 1-2-3 files as part of the tutorial. Leave the
settings as they are unless the tutorial advises you to change them. If
you have different option settings, the illustrations presented in this
chapter may not match the worksheet view.
|
[ Top of Page | Previous Page | Next Page ]
