Each AnthillPro user has some control over what is displayed on the Dashboard; however, what is available is determined by the AnthillPro administrator. In the User Profile, you can add/change your password; user-repository alias; first and last name; e-mail and IM addresses; time zone; and the number of dashboard rows displayed. Any changes made in the Profile will be updated in the AnthillPro security system. See Change User Profile.
Additionally, if the system administrator has elected to have the Dashboard Graphs visible (see Configure Server-wide User Views), you can disable them by selecting the Views tab. See Change User Views.
On the User Profile General tab, update contact information, update password, and/or set up a user alias. Note that the Name filed (denoted by a red asterisk) cannot be changed here. If you need to change the name, contact your AnthillPro administrator.
To change your profile settings:
Select the profile link from the menu at the top of the browser window.

Update Password. On the General tab, select the Update Password button to change your AnthillPro password. In the pop-up window, give:
Your current password.
The new password you want to use when accessing AnthillPro.
A confirmation of your new password.
Click Update.
Once reset, the new password will be required at your next login.
To change name and other user information, click the Edit button. You can then edit your contact information as well as the date and time formats. Note that any changes made here will be reflected in the AnthillPro security system.
Number of Dashboard Rows. To change the number of builds displayed on the Dashboard Workflow page, input it here. For example, if you input 5, only the five most recent builds will appear under the Recent Activity menu on the Main tab.
Add User-Repository Alias. To add a new alias, click the User-Repository Alias button. Select the appropriate repository from the drop-down menu and give the alias used in that repository. Click the Add User-Repository Alias button to finish.
Once created, a User-Repository Alias may not be edited. If your user alias for a repository has changed, delete the current alias (click the Remove icon under the Operations menu) and create a new one.
Click Save. If not changing Views, click Done. Otherwise, see Change User Views.
If your system administrator has elected to have the Dashboard Graphs visible (see Configure Server-wide User Views), you can disable them on the Views tab. However, if the administrator has already disabled the graphs, you will not be able to display them.
To enable/didable Dashboard Graphs:
Select the profile link from the menu at the top of the browser window.

Select the Views tab and click Edit.
Configure settings:
Main Dashboard Graphs. Select Yes to have the Total Source Activity, Build Activity, and Average Test Success graphs displayed on the Main page; or No to disable them.
Project Dashboard Graphs. Select Yes to have the Source Activity, Build Activity, and Average Test Success graphs displayed on the Project page; or No to disable them.
Workflow Dashboard Graphs. Select Yes to have the Source Activity, Build Activity, and Average Test Success graphs displayed on the Workflow page; or No to disable them.
Click Save. If not changing General settings, click Done. Otherwise, see Change User Views.
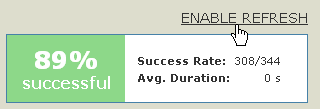
To get the most up-to-date information about your projects, use ENABLE REFRESH. When activated, ENABLE REFRESH will reload the Dashboard every 30 seconds. Any change in project, workflow, or Build Life status will be updated automatically.
Go to the Dashboard.
Select the ENABLE REFRESH link.

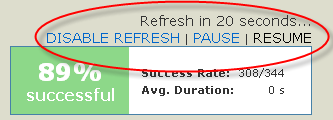
Once enabled, you can either DISABLE or PAUSE refresh by selecting the appropriate link.
If refresh has been paused, it may be restarted by selecting the RESUME link. If refresh has been disabled, it may be restarted by selecting the ENABLE REFRESH link again.
