In this exercise you will learn how to create distribution
list manually and by importing the members from a file.
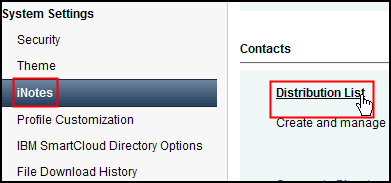
Overview
Administrators can create distribution
lists for sending e-mail to various groups.
Distribution lists allow
you to define groups for different projects, different departments,
or different interests. Both users belonging to your organization
and external users can be added as long as they have a valid e-mail
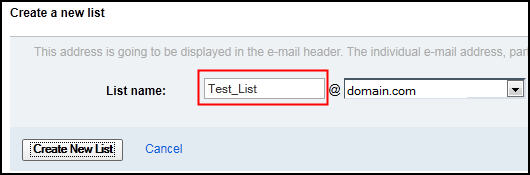
address. You can create the list by entering contact addresses separated
by commas or by importing a comma-separated file of addresses.
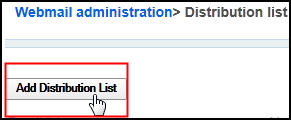
There
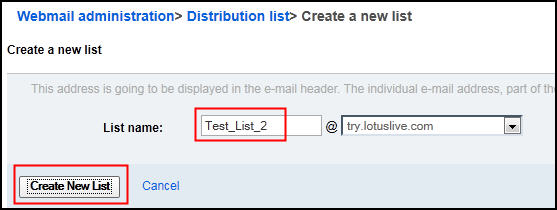
are two methods by which administrators can create distribution lists:
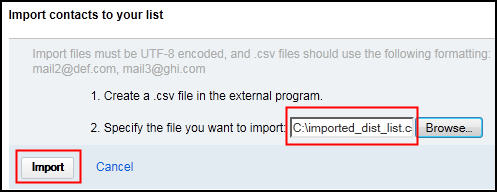
manually or by importing a .csv file containing a list of contacts.
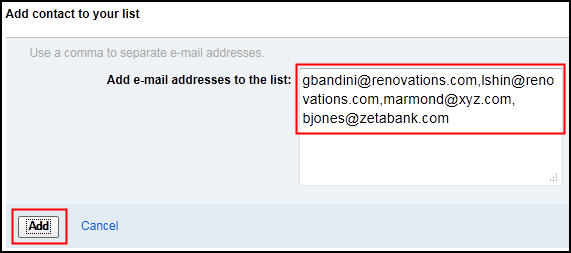
To
add contacts to the distribution list, enter e-mail addresses separated
by commas or import a contact list (.csv). There is no limit to the
number of users that can be added to the distribution list, but there
is a maximum number of ASCII characters that can be included in the
list. The distribution list cannot exceed 8192 ASCII characters. When
determining the number of characters in each user's address, include
the user name, the @, and the domain name. For example, the address
list_name@your_domain.com has 25 characters.
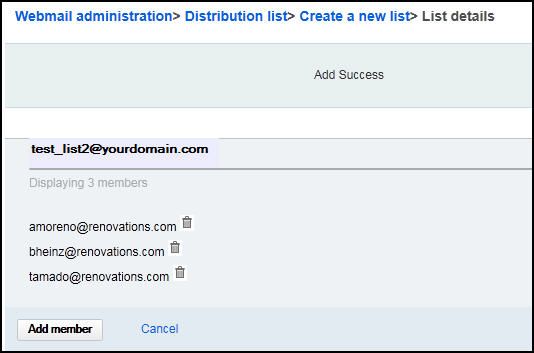
The distribution
displays in the company directory and can be used by all SmartCloud iNotes® subscribers in the company.
Objectives
After completing this exercise, you should be able
to:- Create a distribution list manually
- Create a distribution list from a .csv file
Glossary
| Term |
Definition |
|---|
| .csv file |
Comma separated values file format. This type of file is
used to store tabular data in which numbers and text are stored in
plain-text form that can be easily written and read in a text editor
like Notepad. For purposes of creating distribution lists by importing
a .csv file in the SmartCloud iNotes Administration
panel, the format requires valid e-mail addresses separated by commas.
Example: user_one@domain.com,
user_two@domain.com, user_three@domain.com
|