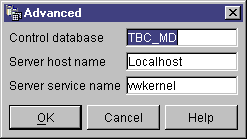
The Advanced window opens.
The Advanced Logon window closes.
The next time that you log on, the Data Warehouse Center will use the settings that you specified in the Advanced Logon window.
The Data Warehouse Center Logon window closes.
In this lesson, you will define security for your warehouse.
The first level of security is the logon user ID that is in use when you open the Data Warehouse Center. Although you log on to the DB2 Control Center, the Data Warehouse Center verifies that you are authorized to open the Data Warehouse Center administrative interface by comparing your user ID to entries in the warehouse control database. The warehouse control database contains the control tables that are required to store Data Warehouse Center metadata. You initialize the control tables for this database when you install the warehouse server as part of DB2 Universal Database or use the Data Warehouse Center Control Database Management window. During initialization, you specify the ODBC name of the warehouse control database, a valid DB2 user ID, and a password. The Data Warehouse Center authorizes this user ID and password to update the warehouse control database. In the Data Warehouse Center, this user ID is defined as the default warehouse user.
| Tip: | The default warehouse user requires a different type of database and operating system authorization for each operating system that the warehouse control database supports. For more information, see DB2 Warehouse Manager Installation Guide. |
The default warehouse user is authorized to access all Data Warehouse Center objects and perform all Data Warehouse Center functions. However, you probably want to restrict access to certain objects within the Data Warehouse Center and the tasks that users can perform on the objects. For example, warehouse sources and warehouse targets contain the user IDs and passwords for their corresponding databases. You might want to restrict access to those warehouse sources and warehouse targets that contain sensitive data, such as personnel data.
To provide this level of security, the Data Warehouse Center provides a security system that is separate from the database and operating system security. To implement Data Warehouse Center security, you define warehouse users and warehouse groups. A warehouse group is a named grouping of warehouse users and their authorization to perform functions. Warehouse users and warehouse groups do not have to match the DB users and DB groups that are defined for the warehouse control database.
For example, you might define a warehouse user that corresponds to someone who uses the Data Warehouse Center. You might then define a warehouse group that is authorized to access certain warehouse sources, and add the new user to the new warehouse group. The new user is authorized to access the warehouse sources that are included in the group.
There are various types of authorization that you can give users. You can include any of the different types of authorization in a warehouse group. You can also include a warehouse user in more than one warehouse group. The combination of the groups to which a user belongs is the user's overall authorization.
In this lesson, you will log on to the Data Warehouse Center as the default warehouse user, define a new warehouse user, and define a new warehouse group.
When you install the Data Warehouse Center as part of the default DB2 installation, the installation process registers the default warehouse control database as the active warehouse control database. However, you must use the TBC_MD database in the sample as the warehouse control database so that you can use the sample metadata. To make TBC_MD the active database, you must reinitialize it.
To reinitialize TBC_MD:
The Data Warehouse Center - Control Database Management window opens.
TBC_MD
The window remains open. The Messages field displays messages that indicate the status of the creation and migration process.
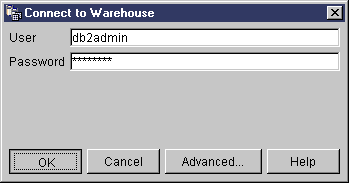
In this exercise, you will start the Data Warehouse Center from the DB2 Control Center and log on as the default warehouse user. When you log on, you will use the TBC_MD warehouse control database. The default warehouse user for TBC_MD is the user ID that you specified when you created the Data Warehousing sample databases.
TBC_MD must be a local or a cataloged remote database on the workstation that contains the warehouse server. It must also be a local or cataloged remote database on the workstation that contains the Data Warehouse Center administrative client.
To start the Data Warehouse Center:
The Advanced window opens.

The Advanced Logon window closes.
The next time that you log on, the Data Warehouse Center will use the settings that you specified in the Advanced Logon window.

The Data Warehouse Center Logon window closes.
In this exercise, you will define a new user to the Data Warehouse Center.
The Data Warehouse Center controls access with user IDs. When a user logs on, the user ID is compared to the warehouse users that are defined in the Data Warehouse Center to determine whether the user is authorized to access the Data Warehouse Center. You can authorize additional users to access the Data Warehouse Center by defining new warehouse users.
The user ID for the new user does not require authorization to the operating system or the warehouse control database. The user ID exists only within the Data Warehouse Center.
To define a warehouse user:
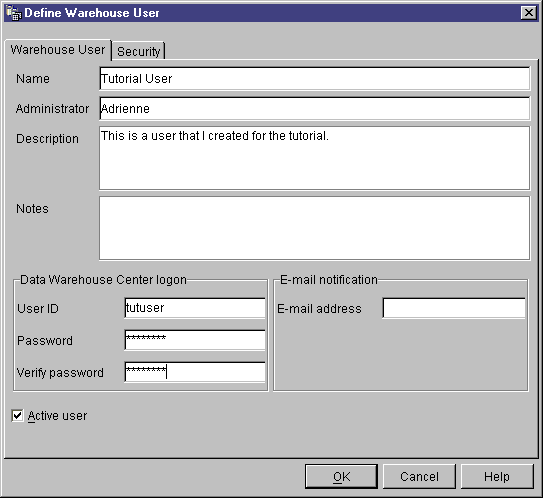
The Define Warehouse User notebook opens.
Tutorial User
The name identifies the user ID within the Data Warehouse Center. This name can be up to 80 characters-including spaces.
This is a user that I created for the tutorial.
| Tip: | You can use the Description and Notes fields to provide metadata about the definitions for your warehouse. You can then publish this metadata in an information catalog for the warehouse. Users of the warehouse can search the metadata to find the warehouse that contains the information they need to query. |
tutuser
The user ID must be no longer than 60 characters and cannot contain spaces, dashes, or special characters (such as @, #, $, %,>, +, =). It can contain the underscore character.
password
Passwords must be a minimum of six characters and cannot contain spaces, dashes, or special characters.
| Tip: | You can change your password on this page of the user notebook. |
| Tip: | You can clear this check box to temporarily revoke a user's access to the Data Warehouse Center, without deleting the user definition. |
In this exercise, you will define a warehouse group that will authorize the Tutorial User that you just created to perform tasks.
To define the warehouse group:
The Warehouse Groups notebook opens.
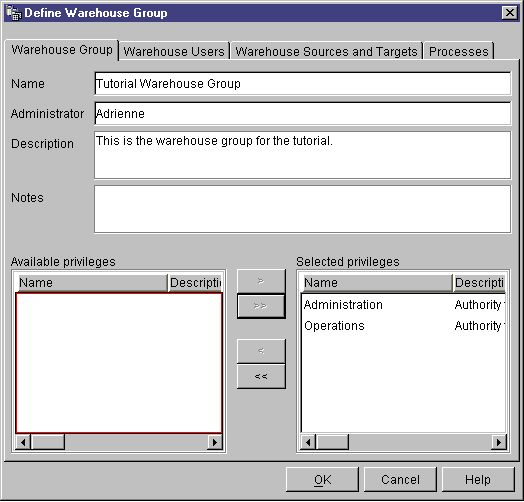
Tutorial Warehouse Group
This is the warehouse group for the tutorial.
The Administration and Operations privileges move to the Selected privileges list. Your group now has the following privileges.
The Tutorial User moves to the Selected warehouse users
list.
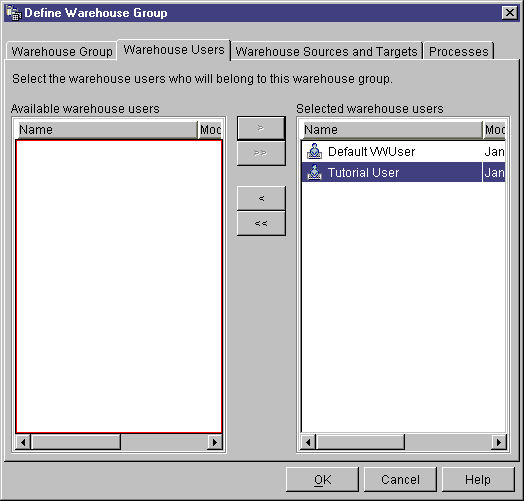
The user is now part of the warehouse group.
Skip the Warehouse sources and targets page and the Processes page. You will create these objects in subsequent lessons. You will authorize the warehouse group to access objects as you create the objects.
In this lesson, you logged on to the Data Warehouse Center, created a new user, and defined a warehouse group. In subsequent lessons, you will authorize the warehouse group to access the objects that you will define.