Business Intelligence Tutorial
Your ultimate goal is to create a OLAP metaoutline that
includes measures in the Central States region, and excludes the other
regions. From that metaoutline you will create an OLAP application that
you can use to examine how sales data from the Central States changed during
1996.
The first step in creating an OLAP metaoutline is to decide whether to use
the OLAP Metaoutline interface, which offers full function, or the Metaoutline
Assistant, which offers a simpler, guided approach. In this lesson, you
will start the OLAP Metaoutline Assistant, select an OLAP model to base your
metaoutline on, and connect to the database.
After you log on to the DB2 OLAP Integration Server, the Desktop is
displayed.
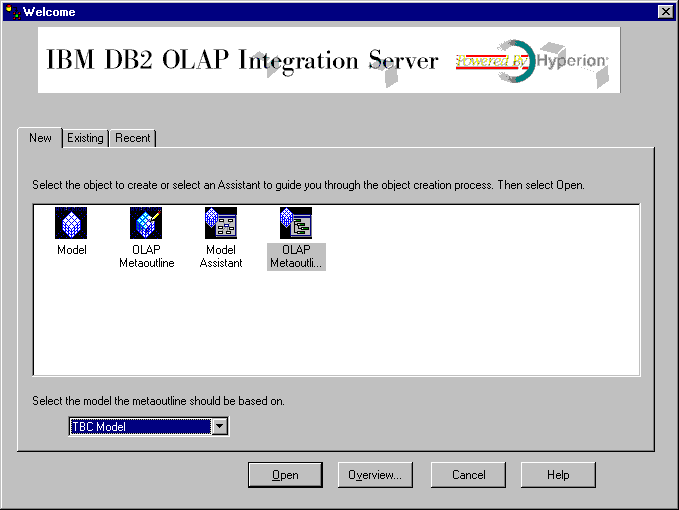
- In the DB2 OLAP Server Desktop, click File --> New.
The Welcome window is displayed.
- Click the Metaoutline Assistant icon.
- Notice that a new field, Select the model the metaoutline should be
based on, is displayed at the bottom of the window. From the
listbox, select TBC Model. This is not the model you created
earlier in this tutorial; this model is more detailed.

- Click Open and you are prompted to log on to the source
database.
- In the Data Source window, type the following values:
- Data Source
- The name of the DB2 database in which your business data is stored.
. This tutorial uses one of the sample databases shipped with DB2
Universal Database, which is called TBC.
- User Name
- The user ID you will use to access DB2 UDB. In the examples in this
tutorial, the user ID is tbc.
- Password
- The password for the user ID entered in Username.
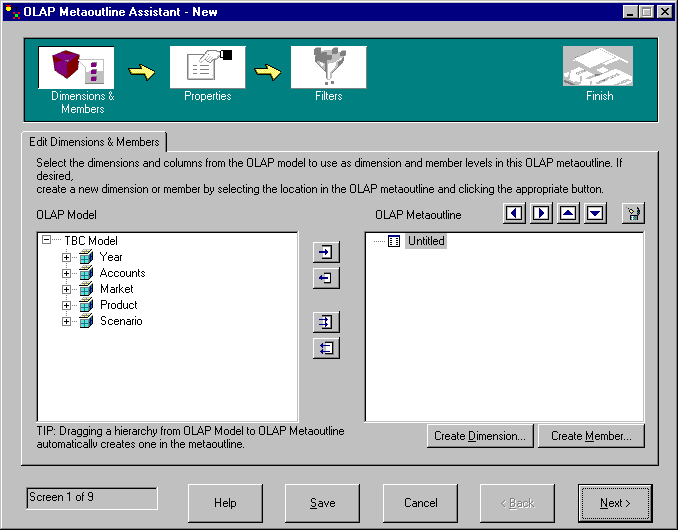
Click OK. The Edit Dimensions and Members page of the
Metaoutline Assistant is displayed.

In this lesson, you started the OLAP Metaoutline Assistant, selected an
OLAP model to base your metaoutline on, and connected to the database.
[ Top of Page | Previous Page | Next Page ]


