Business Intelligence Tutorial
In this lesson, you will select from the model the
dimensions and members that you want to use in the metaoutline.
- On the Edit Dimensions and Members page, open the tree view of the
Accounts dimension in the OLAP Model field until the tables are
visible.
- Select all the columns in the Accounts dimension and click the right arrow
(Add) button. The accounts dimension and its columns are copied to the
OLAP Metaoutline field.
- In the OLAP Model field, open the tree view of the Year
dimension until the hierarchies are visible. Click the Year,
Quarter, Month hierarchy, and click the right arrow (Add) button.
The hierarchy is copied to the OLAP Metaoutline field.
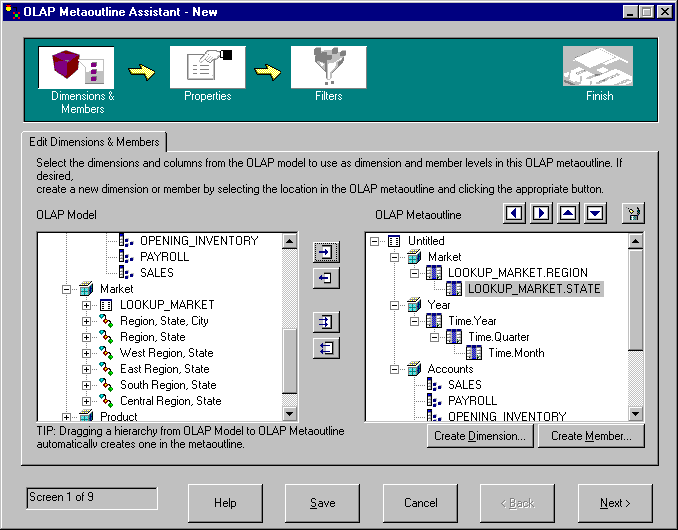
- Open the tree structure of the Market dimension until the hierarchies are
visible. Click the Central Region, State hierarchy, and
click the right arrow (Add) button. The hierarchy is copied to the
OLAP Metaoutline field. The window looks something like
this:

Notice that the metaoutline you are creating is a subset of the TBC model,
not an exact duplicate. You selected the entire Accounts dimension but
only one of the Time hierarchies, and only one Market region.
- Click Next and the Set Dimension Properties page is
displayed.
In this lesson, you added the Accounts, Time, and Market dimensions to
your metaoutline.
[ Top of Page | Previous Page | Next Page ]

