
IBM WebSphere Studio Application Developer Integration Edition PTF 001 -
General Fixes
Installation instructions
This document describes how to install IBM WebSphere Studio Application
Developer Integration Edition PTF 001 - General Fixes. You should have already
downloaded the zip file and unzipped it to a PTF001 folder on your machine.
The PTF has two parts, both of which must be installed to bring WebSphere
Studio up to the 5.0.1level. One part is for the base product, Eclipse, and one
part is for the tools and run-time environment of WebSphere Studio. The
run-time environment is used in the test environment of WebSphere Studio. In
these instructions, you will be told how to use Update Manager to install both
parts.
On Windows, using Update Manager, both parts will be installed automatically
in two separate operations. Should you experience any error messages during the
process, follow the instructions provided in the error message. Should the PTF
for the run-time environment fail to be installed, an information message will
tell you and you can install it afterwards in a manual set of steps documented
here.
On Linux, the procedure is similar but only the PTF for the base product and
the tools is installed. The PTF for the run-time environment must be installed
in a separate manual set of steps documented here.
Interim fixes address specific problems. Several interim fixes have been
issued for the run-time environment. If you needed to manually install the PTF
for the run-time environment, then you need to manually install the interim
fixes too.
The instructions to manually install the PTF for the run-time environment
and install the interim fixes are repeated in the readme file, in case you
install them at a later time. You will find the readme file in the base folder
of the install path for the product.
Finally, instructions have been provided on how to apply the interim fixes
to the standalone WebSphere Application Servers (WAS) where you would deploy
your 5.0.1 applications to.
Note: There are known issues that may result in problems during or
after installing the PTF. To ensure a proper installation:
- If you have disabled any plug-ins either through Update Manager or by
modifying plugin.xml files, enable them prior to installation.
- Once this PTF has been installed, you cannot revert your workspace back
to your Version 5.0 configuration. Version 5.0.1 becomes the new base level
configuration.
- If you deploy applications built after you installed the PTF and updated
WebSphere Studio to the 5.0.1 level, then you will also need to add the
interim fixes to the standalone WebSphere servers, as explained in step 5.
To install the general fixes, the following tasks must be performed:
Step 1 : Install the base PTF
Step 2 :
Install the
PTF for the tools and run-time environment
Step 3 :
Manually
install the PTF for the run-time environment
Step 4 : Install the interim
fixes
Step 5 : Update the
standalone WAS servers
Note: All screen captures in this document are taken from a Windows
installation. Screens will look slightly different on Linux.
- Log on to your system with a userid that has write permission to the
install location and start WebSphere Studio Application Developer Integration
Edition 5.0. (This is typically a userid with Administrator authority
on Windows, and root authority on Linux).
 Do not
start with a workspace that a non-root user may later use. This can cause
problems later since certain files may be written into the workspace during
the update process that cannot be accessed by other users.
- If you have any running servers in the the test environment, stop them.
- Switch to the Install/Update perspective. Click
 . From the pop-up menu, select
Other > Install/Update. Click OK. The Install/Update
perspective opens.
- In the Feature Updates view, expand My Computer. Navigate
to the PTF001 folder where you unzipped the PTF. Expand
UpdateManager, which is located inside it. You will use the highlighted
files in the update folder.

- Although you can install these files in any order, you will install them
in the following logical order. First you will install the base PTF; that is,
the one for the Eclipse platform. Then, later, you will install the PTF for
the tools and run-time environment of WebSphere Studio.
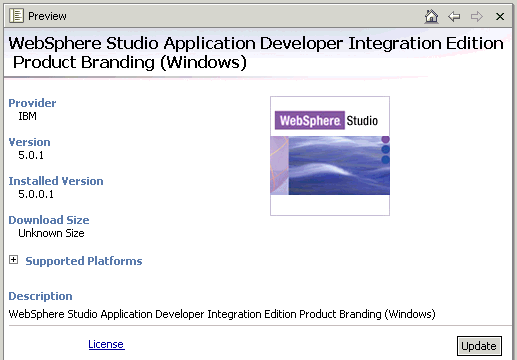
- Select WebSphere Studio Application Developer Integration Edition
Product Branding. The Preview view opens describing the update.
Click Update.
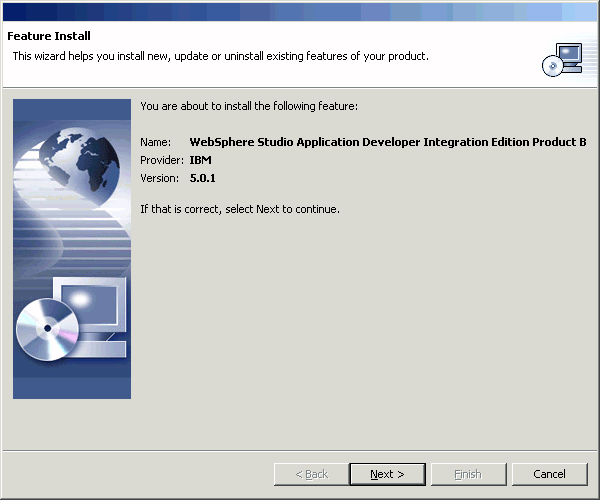
- The Feature Install window opens describing the version you are
about to install. Click Next.
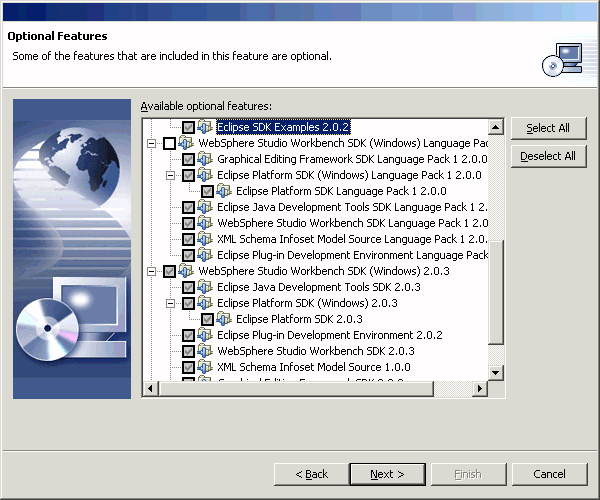
- Read and accept the license and click Next. The Optional
Features page opens.
Warning: Do not modify the selections. Changing the default choices
may result in errors.
Click Next.
- The final screen of the Install wizard shows the installation location.
Warning: Errors may occur if you change the default installation
location.
Click Finish.
- If you are warned that you are about to install an unsigned feature,
click Install to continue.
This warning will not cause problems during installation.
- When the installation is complete you will be asked to restart the
product. Click Yes to complete the installation.
Note: This action will not reboot your machine.

- Return to the Install/Update perspective. In the Feature
Updates view, expand My Computer to the PTF001 folder, if
it is not already open. In the update folder inside UpdateManager,
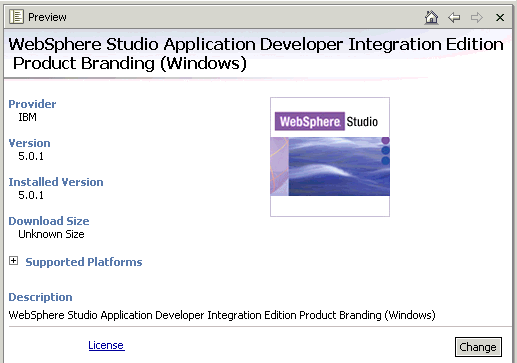
select WebSphere Studio Application Developer Integration Edition Product
Branding. In the Preview view, the Installed Version should
now be 5.0.1. A Change button should replace the Update
button.
- Proceed to Step 2.
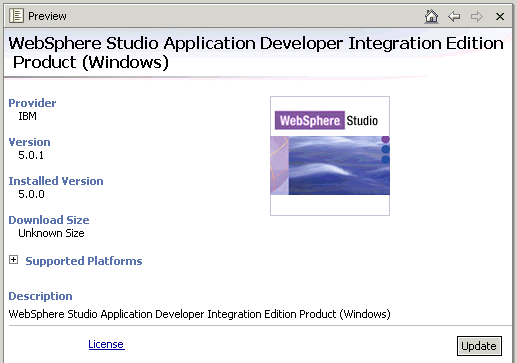
- In the Feature Updates view, select WebSphere Studio
Application Developer Integration Edition Product. The Preview
view opens describing the update. Click Update.
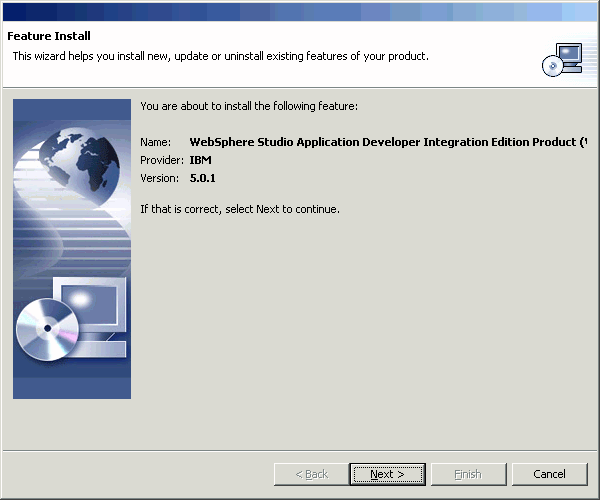
- The Feature Install window opens describing the version you are
about to install. Click Next.
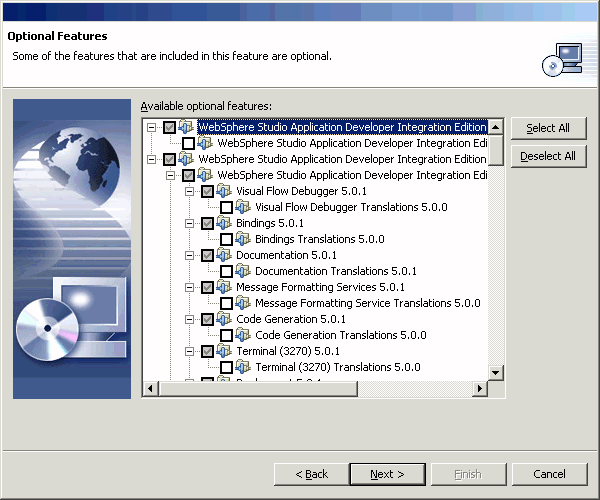
- Read and accept the license and click Next. The Optional
Features page opens.
Warning: Do not modify the selections. Changing the default choices
may result in errors.
Click Next.
- The final screen of the Install wizard shows the installation location.
Warning: Errors may occur if you change the default installation
location.
Click Finish.
- If you are warned that you are about to install an unsigned feature,
click Install to continue.
This warning will not cause problems during installation.
Note: This PTF will take longer to install than the previous one.
Expect an installation time of five minutes or longer. At times a command
window will open. Do not close it or you will terminate the installation and
need to reinstall the PTF manually, as shown in step 3.
- When the installation is complete you will be asked to restart the
product. Click Yes to complete the installation.
Note: This action will not reboot your machine.

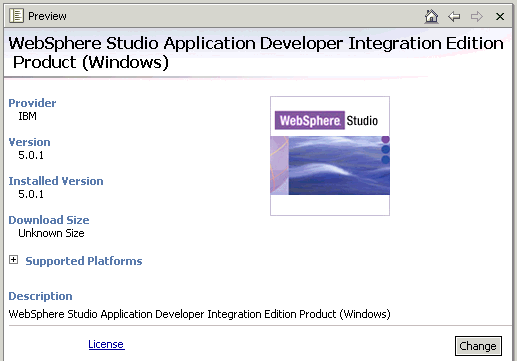
- Return to the Install/Update perspective. In the Feature
Updates view, expand My Computer to the PTF001 folder, if
it is not already open. In the update folder inside UpdateManager,
select WebSphere Studio Application Developer Integration Edition Product.
In the Preview view, the Installed Version should now be
5.0.1. A Change button should replace the Update button.
 If
you received a message while installing the PTF that the installation was
unsuccessful, proceed to step 3, manually install the PTF for the run-time
environment. Otherwise, proceed to the Verification section.
 Proceed to
the Verification section.
 Proceed to step 3.
Verification
In this section, you will verify that the PTF for the run-time environment
was installed.
- Create and launch a new enterprise server instance. For example, create
an enterprise server instance called EETestServer. Next, select the
Servers tab in the Servers view of the Business Integration
perspective. Right-click EETestServer. From the pop-up menu, select
Start. The Console view opens as the server starts.
- In the first line of the console output, you should see the following
text to indicate the update to 5.0.1:
WebSphere Platform 5.0 [BASE 5.0.1 ptf ... ] [PME 5.0.1 ptf...]
- You can alternately use the administrative console for verification. To
enable it, follow these steps:
- In the Servers view, select the Server Configuration tab.
Right-click your new server instance and from the pop-up menu, select
Open. Click the Configuration tab. Select Enable
administration console and save and close your server configuration.
- Select the Servers tab and right-click your server. From the
pop-up menu, select Start. Once started, select the server again and
from the pop-up menu, select Run Administrative console. The console
will launch in the internal browser of the workbench. You will be asked for
a login userid. If you have never created one, enter a new one, such as
IBM, and click OK. In the About your WebSphere Application Server
section of the console, a 5.0.1 indicates a successful installation.
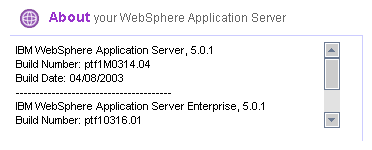
Note: Now that you have updated your run-time environment to the
5.0.1 level, it is recommended that you create new server instances for all
your existing projects.
 and
and
 If you saw the
same result in your console, then you are almost finished in terms of
installing the fixes for WebSphere Studio. However, you still need to install
the interim fixes for the base run-time environment and you will also want to
update the standalone WAS servers you deploy your applications to. Proceed to
Interim fixes
for the base WAS run-time environment.
If you did not see this result, proceed to step 3, Manually install the PTF for
the run-time environment.
 Proceed
to step 3.
 Unzipping some files
- Close WebSphere Studio.
- Using a file manager, open the following folder:
WSinstalldir\Runtime Updates
- Create three folders in Runtime Updates: ASV PTF, PME PTF,
and InterimFixes.
- Unzip was50_fp1_linux.zip to the ASV PTF folder. These
files will update the base run-time environment.
- Unzip was50_pme_fp1_linux.zip to the PME PTF folder. These
files will update the WAS Enterprise run-time environment.
- Unzip WAS_WSADIE_cumulative_Fix.zip to the InterimFixes
folder. These interim fixes will be needed in the run-time environment to
support applications created by the 5.0.1 tools.
Installing the PTF to the base WAS Enterprise run-time environment
Note: If you plan to install embedded messaging with WebSphere Studio
and have not yet installed it, do so before continuing. Otherwise, if you
install embedded messaging with WebSphere Studio after updating to 5.0.1, then
you will need to repeat steps 3 and 4 in this document to complete the
installation.
- Close WebSphere Studio, if open.
- Using a file manager such as Windows Explorer, open the following folder:
WSinstalldir\Runtime Updates\ASV PTF
If you see a folder inside it called java_tmp, delete it.
- Open a command window.
On Windows, change the path to:
WSinstalldir\runtimes\ee_v5\bin
Run setupCmdLine.bat.
On Linux, execute this command:
export JAVA_HOME=/opt/IBM/WebSphereStudio/runtimes/ee_v5/java
- In the same command window, change the path to:
WSinstalldir\Runtime Updates\ASV PTF
Run updateWizard.bat (or updateWizard.sh on Linux).
The Update Installation wizard opens. Click Next.
- On the following page, select Specify product information. Click
Browse beside the Installation directory field. A folder dialog
opens. Navigate to:
WSinstalldir\runtimes
Select ee_v5 from the folders listed. Click Open (or OK
on Linux). The path is entered in the Installation directory
field. It should be:
WSinstalldir\runtimes\ee_v5
Click Next.
- The following page lists what can be installed. Select Install fix
packs. Click Next.
- The following page requests where the fix packs are located. Check that
the Fix pack directory field is:
WSinstalldir\Runtime Updates\ASV PTF\fixpacks
Click Next.
- On the following page, the fix pack available for installation is listed.
Click Next.
- The external components linked to the update are listed. If you installed
embedded messaging in WebSphere Studio Application Developer Integration
Edition 5.0 then you should select Embedded Messaging and specify the
install path. If you did not install embedded messaging then you should clear
the Embedded Messaging check box. Click Next.
- The following page summarizes the installation, listing the fix pack, the
product, and the directory to be updated. Click Next.
Note: Expect an installation time of five minutes or longer.
- A final page confirms a successful installation. Click Finish.
Close the command window.
Installing the PTF unique to the WAS Enterprise run-time environment
- Using a file manager such as Windows Explorer, open the following folder:
WSinstalldir\Runtime Updates\PME PTF
If you see a folder inside it called java_tmp, delete it.
- Open a command window.
On Windows, change the path to:
WSinstalldir\runtimes\ee_v5\bin
Run setupCmdLine.bat.
On Linux, execute this command:
export JAVA_HOME=/opt/IBM/WebSphereStudio/runtimes/ee_v5/java
- In the same command window, change the path to:
WSinstalldir\Runtime Updates\PME PTF
Run updateWizard.bat (or updateWizard.sh on Linux).
The Update Installation wizard opens. Click Next.
- On the following page, select Specify product information. Click
Browse beside the Installation directory field. A folder dialog
opens. Navigate to:
WSinstalldir\runtimes
Select ee_v5 from the folders listed. Click Open (or OK
on Linux). The path is entered in the Installation directory field. It
should be:
WSinstalldir\runtimes\ee_v5
Click Next.
- The following page lists what can be installed. Select Install fix
packs. Click Next.
- The following page requests where the fix packs are located. Check that
the Fix pack directory field is:
WSinstalldir\Runtime Updates\PME PTF\fixpacks
Click Next.
- The fix pack available for installation is listed. Click Next.
- The following page summarizes the installation, listing the fix pack, the
product, and the directory to be updated. Click Next.
- A final page confirms a successful installation. Click Finish.
Close the command window.
- Open WebSphere Studio.
- Create and launch a new enterprise server instance. For example, create
an enterprise server instance called EETestServer. Next, select the
Servers tab in the Servers view of the Business Integration
perspective. Right-click EETestServer. From the pop-up menu, select
Start. The Console view opens as the server starts.
- In the first line of the console output, you should see the following
text to indicate the update to 5.0.1:
WebSphere Platform 5.0 [BASE 5.0.1 ptf ... ] [PME 5.0.1 ptf...]
- You can alternately use the administrative console for verification. To
enable it, in the Servers view, select the Server Configuration
tab. Right-click your new server instance and from the pop-up menu, select
Open. Click the Configuration tab. Select Enable administration
console and save and close your server configuration.
- Select the Servers tab and right-click your server. From the
pop-up menu, select Start. Once started, select the server again and
from the pop-up menu, select Run Administrative console. The console
will launch in the internal browser of the workbench. You will be asked for a
login userid. If you have never created one, enter a new one, such as IBM,
and click OK. In the About your WebSphere Application Server
section of the console, a 5.0.1 indicates a successful installation.
- Proceed to step 4.
Note: You should recreate server instances for cases where
applications are using compensation in a process.
These interim fixes are for the base run-time environment. By base run-time
environment, we mean the WAS run time, not the WAS Enterprise run time. You
select this run time when you choose Test Environment, not EE Test
Environment, when configuring a server instance.
- The base run-time environment used in the test environment must first be
updated to the 5.0.1 level before the interim fixes can be applied. To update
this base run-time environment, open WebSphere Studio. Open the
Install/Update perspective. In the Feature Updates view, expand
Sites to Visit. Expand IBM WebSphere Studio Application Developer
Integration Edition Interim Fixes. Select WebSphere Application Server
Fixpacks 5.0.1. A description of the site opens in the Preview
view. Click More Info.
- Follow the instructions and update WebSphere Application Server 5.0. You
can also update other run times, such as WebSphere Application Server 4.0.
Close WebSphere Studio, if open.
- Open a command window.
On Windows, change the path to:
WSinstalldir\runtimes\base_v5\bin
Run setupCmdLine.bat.
On Linux, execute this command:
export JAVA_HOME=/opt/IBM/WebSphereStudio/runtimes/base_v5/java
- In the same command window, change the path to:
WSinstalldir\runtimes\ee_v5\WAS50_efix
Run efixWizard.bat (or efixWizard.sh on Linux).
The efix Installation wizard opens. Choose a language and click OK.
A Welcome page opens describing the wizard. Click Next.
- On the following page, select Specify product information. Click
Browse beside the Installation directory field. A folder dialog
opens. Navigate to:
WSinstalldir\runtimes
Select base_v5 from the folders listed. Click Open (or OK
on Linux). The path is entered in the Installation directory field. It
should be:
WSinstalldir\runtimes\base_v5
Click Next.
- The following page lists what can be installed. Select Install eFixes.
Click Next.
- The following page requests where the eFixes are located. Click Browse
beside the eFix Directory field. Navigate to:
WSinstalldir\Runtime Updates
Select InterimFixes from the folders listed. Click Open (or
OK on Linux). The path is entered in the eFix Directory field. It
should be:
WSinstalldir\Runtime Updates\InterimFixes
Click Scan. All eFixes are listed. Select the following:
WAS_WebServices-WSIF_05-01-2003_5.0.1-5.0.0_cumulative_Fix.jar
WAS_WSADIE_05_14_2003_5.0.1-5.0.0_cumulative_Fix.jar
Click Next.
- The following page summarizes the installation, listing the eFixes, the
product and the directory to be updated. Click Next.
- A final page confirms a successful installation. Click Finish.
Close the command window.
- Verify that you updated the base run-time environment by following
similar steps to those in the Verification
section. However, select Test Environment when creating a new server
instance, not EE Test Environment. You should see BASE 5.0.1 in the
console. You should not see PME 5.0.1, as it is exclusive to the EE Test
Environment.
 and
and
 If you
successfully completed step 2, and saw 5.0.1 in the console, then skip
the following section and proceed to step 5,
Update the standalone WAS
servers. Otherwise, proceed to the next section, installing the interim
fixes for the WAS Enterprise run-time environment.
 Proceed
to the next section.
Interim fixes for the WAS Enterprise run-time environment
These interim fixes are for the WAS Enterprise run-time environment. You
select this run time when you choose EE Test Environment, not Test
Environment, when configuring a server instance.
- Close WebSphere Studio.
- Open a command window.
On Windows, change the path to:
WSinstalldir\runtimes\ee_v5\bin
Run setupCmdLine.bat.
On Linux, execute this command:
export JAVA_HOME=/opt/IBM/WebSphereStudio/runtimes/ee_v5/java
- In the same command window, change the path to:
WSinstalldir\runtimes\ee_v5\WAS50_efix
Run efixWizard.bat (or efixWizard.sh on Linux).
The efix Installation wizard opens. Choose a language and click OK.
A Welcome page opens describing the wizard. Click Next.
- On the following page, select Specify product information. Click
Browse beside the Installation directory field. A folder dialog
opens. Navigate to:
WSinstalldir\runtimes
Select ee_v5 from the folders listed. Click Open (or OK
on Linux). The path is entered in the Installation directory field. It
should be:
WSinstalldir\runtimes\ee_v5
Click Next.
- The following page lists what can be installed. Select Install eFixes.
Click Next.
- The following page requests where the eFixes are located. Click Browse
beside the eFix Directory field. Navigate to:
WSinstalldir\Runtime Updates
Select InterimFixes from the folders listed. Click Open (or
OK on Linux). The path is entered in the eFix Directory field. It
should be:
WSinstalldir\Runtime Updates\InterimFixes
Click Scan. All eFixes are listed. Select them all. There should be
four. Click Next.
- The following page summarizes the installation, listing the eFixes, the
product and the directory to be updated. Click Next.
- A final page confirms a successful installation. Click Finish.
Close the command window.
- Proceed to step 5, Update the standalone WAS servers.
Note: Are you using the Rational ClearCase SCM Adapter? If so, the
ClearCase SCM Adapter was also updated since the 5.0 release. Instructions to
install the ClearCase update are found
here. In those instructions, the ClearCase update will be found under IBM
WebSphere Studio Application Developer Integration Edition Fixes when using
Update Manager with Windows. For Linux, a manual installation is required and
the file provided.
You will undoubtedly deploy applications built after you installed the PTF
and updated WebSphere Studio Application Developer Integration Edition to the
5.0.1 level. Therefore, you will also need to add the interim fixes to the
standalone WebSphere Application Servers (WAS). Adding the interim fixes to the
standalone WAS servers is similar to the previous instructions, but you must
first get the interim fixes from the WAS Support site. To update the standalone
WAS servers, click here.
© Copyright International
Business Machines Corporation, 2000, 2003.
All rights reserved.
![]()


![]() and
and
![]() If you saw the
same result in your console, then you are almost finished in terms of
installing the fixes for WebSphere Studio. However, you still need to install
the interim fixes for the base run-time environment and you will also want to
update the standalone WAS servers you deploy your applications to. Proceed to
Interim fixes
for the base WAS run-time environment.
If you saw the
same result in your console, then you are almost finished in terms of
installing the fixes for WebSphere Studio. However, you still need to install
the interim fixes for the base run-time environment and you will also want to
update the standalone WAS servers you deploy your applications to. Proceed to
Interim fixes
for the base WAS run-time environment. ![]() Proceed
to step 3.
Proceed
to step 3.![]() and
and
![]() If you
successfully completed step 2, and saw 5.0.1 in the console, then skip
the following section and proceed to step 5,
Update the standalone WAS
servers. Otherwise, proceed to the next section, installing the interim
fixes for the WAS Enterprise run-time environment.
If you
successfully completed step 2, and saw 5.0.1 in the console, then skip
the following section and proceed to step 5,
Update the standalone WAS
servers. Otherwise, proceed to the next section, installing the interim
fixes for the WAS Enterprise run-time environment. ![]() Proceed
to the next section.
Proceed
to the next section.