Library workflow definitions and library jobs are typically used to set up standardized processes across multiple projects.
The library job can be used either by a project workflow or a library workflow definition. When added to a project during workflow configuration, the job is added on the workflow Definition page as an embedded job. This allows each individual workflow to use a combination of library jobs and project jobs, and provides flexibility while still allowing you to reuse many of the same processes.
The library workflow, configured similar to a project workflow, can only use library jobs as part of its definition. When added to a project during workflow configuration, the workflow definition is added on the workflow Definition page as a library definition.
Library jobs and workflow definitions do not necessarily have to be placed in the Job Library/Workflow Library folder -- they can be placed anywhere within the Admin tree. Additionally, any jobs or workflow definitions (on the Administration page) not in a folder or as part of a project subdirectory are library jobs and workflow definitions.
See Creating Library Jobs and Creating Workflow Definitions.
Once configured, the library jobs are added to workflows of any existing project on the workflow Definition tab. Library jobs may also be added to library workflows, and will be used by any project configured to use that Workflow Definition (see Creating Workflow Definitions). Additionally, Library Jobs may also be created by copying an existing project job.
Go to Administration > Job Library.
On the Job Library page, click the New Job link.
Configure the job.
If the job is to be used in an Operational Project, do not select a Life-Cycle Model or SCM type. See Operational Projects.
Click Save.
Go to Administration and select the project that will use this job.
Select the workflow that this job will be added to as part of the definition.
Select the Definition tab.
Select Embedded Definition from the drop-down menu, and click Select.
Click the START icon to insert the job.
Select the job from the drop-down menu, select the Pre-condition Script, and click Insert Job.
To use a library job as part of a library workflow definition, see Creating Workflow Definitions.
To export a Library Job:
Go to Administration.
Click the Export Job icon of the job to be exported.
The Job configuration will be exported to the specified directory (or opened up in an XML editor).
To import a Library Job:
Go to Administration > Import Project icon of the Library Job folder.
Import the file containing the XML description, or paste the XML description into the text field.
Click Import.
See also Import and Export Workflow Definitions.
Once configured, Workflow Definitions are added to existing projects as part of the project-workflow creation process (on the project-workflow Definition tab).
Go to Administration > Workflow Library.
On the Workflow Library page, follow the New Workflow link.
Configure the Workflow Definition and click Save.
Add a job to the Workflow Definition. Only jobs created in the Job Library may be added to this workflow definition. See Creating Library Jobs.
Specify any Properties to be passed to all workflows using this library workflow. You will need to define a property on the library workflow, the value of which will be different for each project workflow that uses the library definition.
For example, you have two projects that use a library workflow for builds. To have each project use the correct build script, you would define a property on the library workflow. Then, when you configure the projects that use this workflow definition you would assign a value to the property.
Go to Administration > Workflow Library and select the appropriate Workflow Definition.
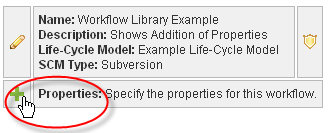
Select the Add Property icon.

Name the Property and click Save.
Configure the permissions for the Workflow Definition. Determine what user roles can perform which actions on the Workflow Definition. See Manage Security.
Go to Administration > Workflow Library and select the appropriate Library Definition.
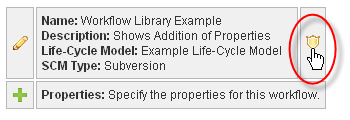
Select the Security icon.

Determine permissions. See Manage Security.
Click Save then Done.
Go to Administration and select the workflow that the Workflow Definition is to be added to.
Select the Definition tab.
Click the Reset button and select the Workflow Definition from the drop-down menu.
Click Select.
Select the Properties tab if Property has been specified on the Workflow Definition. See Specify Workflow Definition Properties.
Select the Property created in the Specify Workflow Definition Properties step.
Configure Property:
Name. The name of this Property has been inherited from the Workflow Definition. Do not change the name.
Description. Provide a description for this Property to be shown when prompting users for a value.
Default Value. Give the value for this property.
User May Override. Check the box if the user may specify a new value when running the workflow.
Label. Provide a label for this Property to be shown when prompting users for value (leave blank to use the Name as the label).
Is Required. Check the box to require a non-empty value for this property when running this workflow.
Allowed Values. Give the values users are allowed to select for this property (leave blank for no value restriction). Separate each value by entering it on its own line.
Click Save.
To export a Library Workflow:
Go to Administration.
Click the Export Workflow icon of the workflow to be exported.
The workflow configuration will be exported to the specified directory (or opened up in an XML editor).
To import a Library Workflow:
Go to Administration > Import Project icon of the Library Workflow folder.
Import the file containing the XML description, or paste the XML description into the text field.
Click Import.
See also Import and Export Library Jobs.