ZipPrint compared to Print Screen
To understand what ZipPrint does, we can compare ZipPrint with the old-style Print Screen function.
You probably already know how Print Screen works in a 3270 Display Session.
It sends the contents of one screen (the currently displayed screen) to the printer.
To use Print Screen, follow these steps:
-
Navigate to the screen that you want to print.
-
Click File > Print Screen.
The contents of the screen are printed on the printer.
As an example, suppose that
you are running a 3270 Display session
and that you have opened an OfficeVision note log and are viewing a note,
so that the first page of the note is displayed
in the session area.
Click here to view the session window.
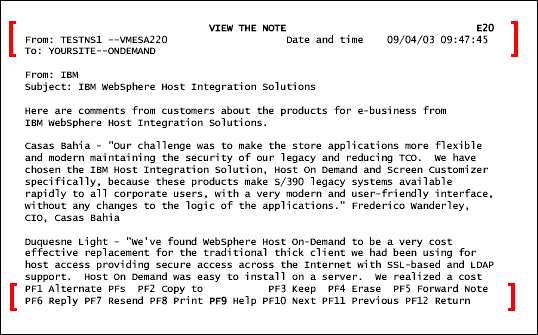
If you used File > Print Screen to print this session screen,
the printed output
would look something like the image shown below. Notice that:
-
Only one page is printed, because Screen Print prints only the
currently displayed screen.
-
The printed output is hard copy (paper) rather than
soft copy (electronic copy).
Consequently, you cannot copy this output into an electronic
document,
such as a Lotus Word Pro document or a Microsoft Word document.
-
The printed output includes all the information
that appears in the session screen.
Notice that some of this information is information
that you probably would not want to be printed as part
of the document.
-
This unwanted information includes
-
-- The header information displayed across the top of the screen
-
-- The list of function keys across the bottom of the screen.
Large red bracket characters
[ ]
have been added in the margins to indicate this unwanted information.
-
Although this information is certainly significant when you
are viewing the document, it is not actually a part of the text of the
document. Therefore you would probably not want it printed if you
were able to print the whole document.

|


