Step
 of 11:
Finish creating your HTML file.
Now that you have configured your
Host On-Demand session to use Web Express Logon and have recorded your login
macro, you are ready to finish creating your HTML file. At this point, you are
still using the Deployment Wizard tool (continued from Step 10).
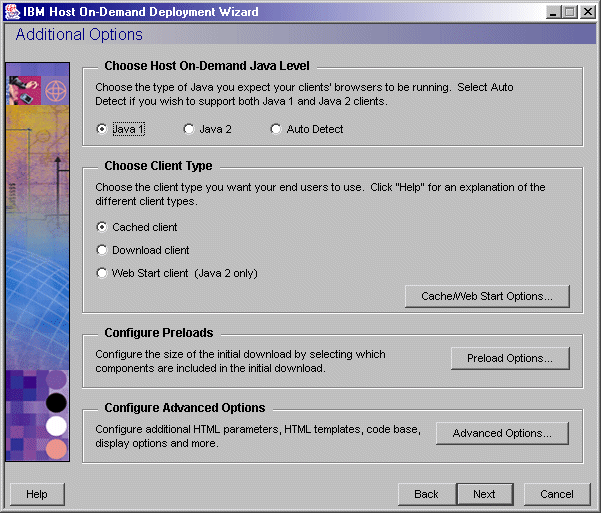
- On the Host Sessions window, click
Next to open the Additional Options window.
Make any changes that you desire and click Next.

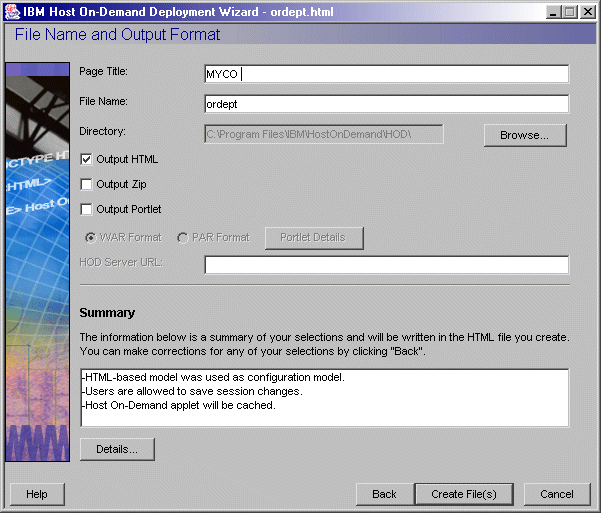
- On the File Name and Output Format
window, enter the page title, the file name, and choose the directory where
you want to save your file. You should save it to the Host On-Demand server
in a directory known to your Web server; usually, this directory is your Host
On-Demand server's publish Directory. Click Create File(s) to finish creating
your HTML file.

Congratulations! You have now completed Scenario #1: Macro-based automation:
Configuring Web Express Logon in a z/OS and DCAS environment. To troubleshoot
any problems, refer to Troubleshooting Web
Express Logon (opens new browser).
Back
to top
Click Next
to go to Scenario #2: Configuring Web Express Logon in a vault-style environment.


