- On Windows NT, click Start --> Programs -->IBM DB2 --> Control Center.
- On AIX or Sun Solaris, type the following command:
db2jstrt 6790
db2cc 6790b
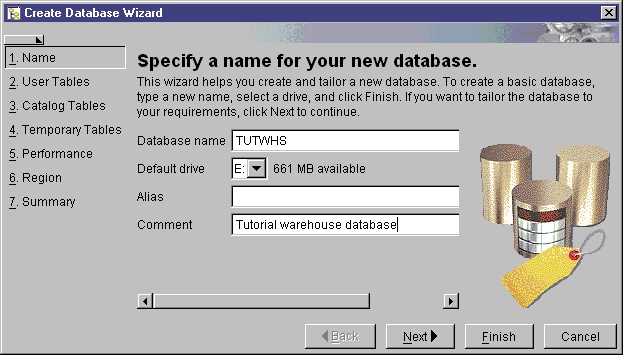
TUTWHS
Tutorial warehouse database
In this lesson, you will create the database for your warehouse and register the database with ODBC.
As part of DB2 First Steps, you had DB2 create the DWCTBC database, which contains the source data for this tutorial.
In this lesson, you will create the database that is to contain a version of the source data that is transformed for the warehouse. In Lesson 3, Browsing the source data, you learn how to view the source data. The rest of the tutorial teaches you how to transform that data and work with your warehouse database.
In this lesson, you will also learn how to register your database with Open Database Connectivity (ODBC), which allows tools like Lotus(R) Approach and Microsoft Access to work with your warehouse.
In this exercise, you will use the Create Database wizard to create the TUTWHS database for your warehouse.
To create the database:
db2jstrt 6790 db2cc 6790b
TUTWHS
Tutorial warehouse database
There are several ways that you can register a database with ODBC. You can use the Client Configuration Assistant on Windows NT, the Command Line Processor, or the ODBC32 Data Source Administrator on Windows NT. In this exercise, you will use the Client Configuration Assistant.
For more information about the Command Line Processor, see the DB2 Universal Database Command Reference. For more information about the ODBC32 Data Source Administrator, see the online help in the Administrator.
To register the TUTWHS database with ODBC:
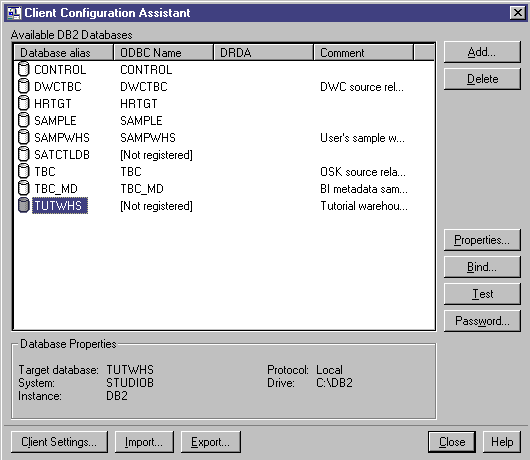
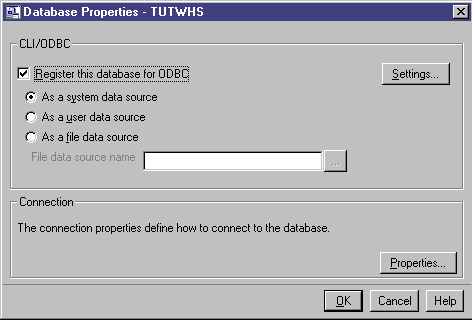
The Properties and Settings push buttons in the Client Configuration Assistant window are used to optimize your ODBC connections and configuration. You do not need to adjust these properties or settings for the tutorial, but there is online help available if you need to work with them in your daily environment.
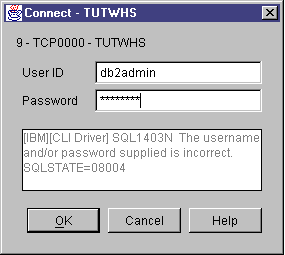
Before you use the database that you defined, you must verify that you can connect to the database.
To connect to the database:
The Connect window opens. It displays the user ID and password that you used to log on to the DB2 Control Center.
The DB2 Control Center connects to the database.
In this lesson, you created the TUTWHS database to contain the data for the warehouse. Then, you registered the database with ODBC. Finally, you verified that you can connect to the database. In the next lesson, you will view the source data that you will later transform and store in the database that you just created.