Business Intelligence Tutorial
In this lesson, you will set filters that limit the
members or data that are loaded into an OLAP application. For example,
if the OLAP model contains data for the entire year, you can set a filter to
load only the data for the second quarter.
In this exercise, you will create a filter that limits the data loaded in
your OLAP application to data from 1996.
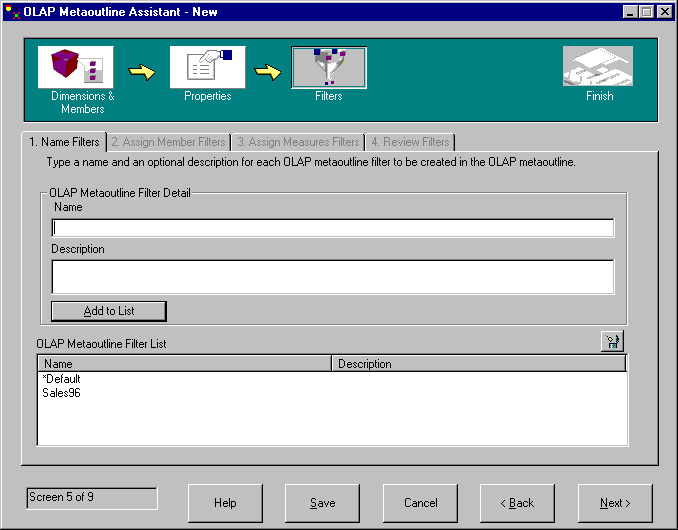
- On the Name Filters page, type Sales96 in the Name
field and click Add to List. The name is added to the
Metaoutline Filter List field.

- Click Next and the Assign Member Filters page is
displayed.
- Select Sales96 in the Metaoutline Filter List
field.
- In the Members field, open the tree view of the Year dimension
and select the Time, Year hierarchy.
- Click Define Filter and the Filters window is displayed.
Use this window to specify the data to be filtered from the OLAP
application. You will create a filter on the time dimension that has
one condition.
- For the first condition, keep the value of Year in the
Column field. In the Operator listbox, select the
equals sign (=).
- Click the button to the right of the Condition field and the
Select Values from Time, Year window is displayed.
- Select 1996 from the list and click OK to return to
the Filters window.
- On the Filters window, click Add, and the filter is displayed
in the Filters field. If you want, you can edit the filter
directly in the Filters field, but do not do that now.
- Click Verify to make sure the syntax of the filter is correct,
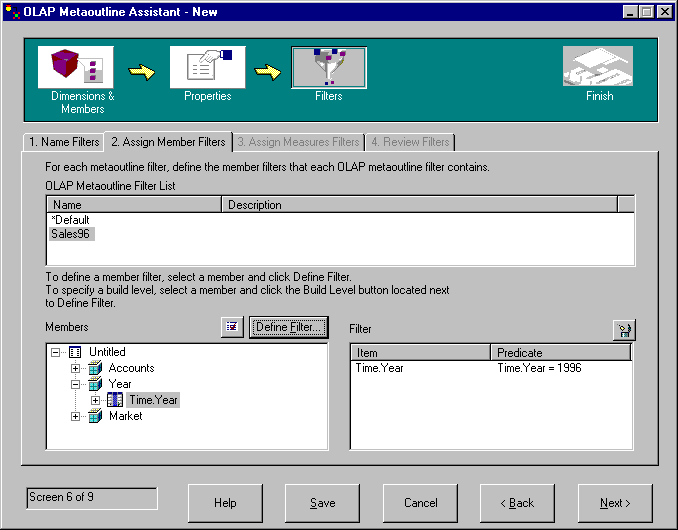
and click OK to close the Filters window. The Assign Member
Filters page looks like this:

In this exercise, you will examine how to set filters on dimension
members, and review the filters you have created.
- Click Next and the Assign Measure Filters page is
displayed. On this page you can define filters for dimensions that
contain measures, such as the Accounts dimension. For example, you
could open the tree view of the Accounts dimension, select the Sales table,
and define a filter that limits sales to those greater than 100.
- Click Next and the Review Filters page is displayed. On
this page you can look at all your filters. You can also go back to
previous pages to edit existing filters or add more filters.
- Click Next and the Finish window is displayed.
In this lesson, you set a filter that limits the data loaded into your
OLAP application to data from 1996.
[ Top of Page | Previous Page | Next Page ]


