OLAP Spreadsheet Add-in User's Guide for Excel
A linked reporting object is an external file, cell note, or World
Wide Web resource that you link to a cell in a Hyperion Essbase
database. The file, note, or Web resource (indicated by a URL, or
Uniform Resource Locator) can then be retrieved by the Hyperion Essbase
Spreadsheet Add-in users who have access to the database.
| Note: | If your organization has licensed and implemented Hyperion Essbase
Partitioning option, you can also access linked partitions from
cells in Hyperion Essbase Spreadsheet Add-in. For more information on
linked partitions, see Accessing Linked Partitions.
|
This section describes the following procedures:
| Note: | For additional information on using linked reporting objects, see the
Hyperion Essbase Spreadsheet Add-in online help.
|
With the linked reporting objects feature, you can link an external file to
a data cell in Hyperion Essbase Spreadsheet Add-in. Hyperion Essbase
stores the file on the Hyperion Essbase server. Users who have access
to the database can then retrieve the file and view the data contained in the
cell.
The following example uses the Asymm.xls sample worksheet
with data from the Sample Basic database. It links a sample file,
Budasmp.txt, to a cell containing the Budget figure.
Budasmp.txt details the budgetary assumptions for the
current year.
Follow these steps to link a file to a data cell:
- Select File > Open.
- From the \essbase\client\sample directory, open the
Asymm.xls file.
- Make sure that you are connected to the Sample Basic database. If
you are not connected, see Connecting to a Database.
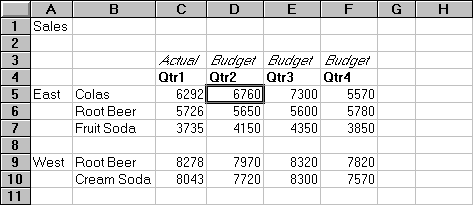
- Select cell D5.
| Note: | You can link objects only to data cells, not to cells containing member
names.
|
Figure 141. Selecting a Data Cell for Linking an External File
- Select Essbase > Linked Objects.
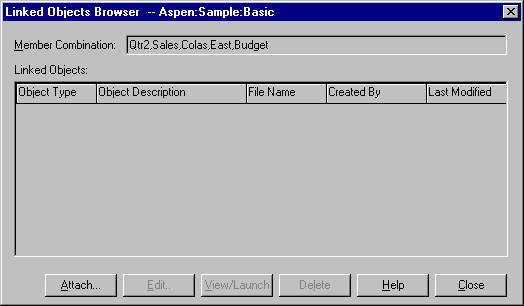
Hyperion Essbase displays the Linked Objects Browser dialog
box.
Figure 142. Linking a File
- In the Linked Objects Browser dialog box, click the
Attach button.
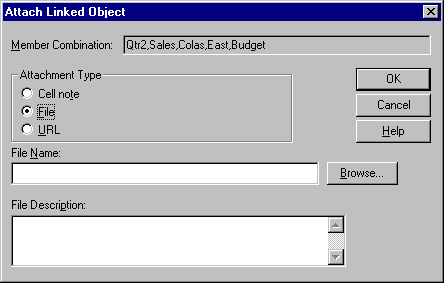
Hyperion Essbase displays the Attach Linked Object dialog
box.
- Under the Attachment Type option group, select File.
Figure 143. Linking a File to a Data Cell
- Click the Browse button (next to the File Name text
box).
Hyperion Essbase displays the Browse Files dialog box.
- Go to the \essbase\client\sample directory and select the
Budasmp.txt file.
- Click Open.
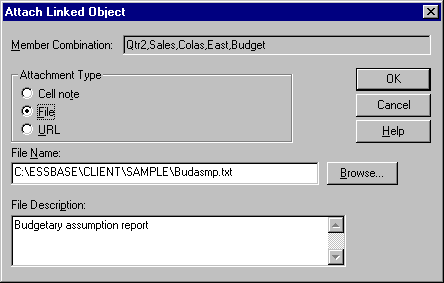
- Under File Description, enter a brief description for the file as
indicated in Figure 144.
Figure 144. Selecting and Describing a File to Link
| Note: | Entering text in the File Description text box is optional.
|
- Click OK to close the dialog box and link the file to the cell.
Hyperion Essbase copies the file to the server and establishes a link to
the current data cell.
- Click Close to close the Linked Objects Browser dialog
box.
- Do not close the Asymm.xls file. You use it in
the next tutorial task.
To recognize cells that have linked reporting objects attached to them, you
may want to apply a visual cue, or style, to the cells.
To apply styles:
- Select Essbase > Options and select the Style tab.
- In the Data Cells area, select Linked Objects.
- Click Format.
- In the Font style list box, select Italic.
- In the Color list box, select Purple. Click OK.
- Select the Display tab.
- In the Cells option group, select the Use Styles box.
Click OK.
- Select Essbase > Retrieve to refresh the worksheet and apply the
styles.
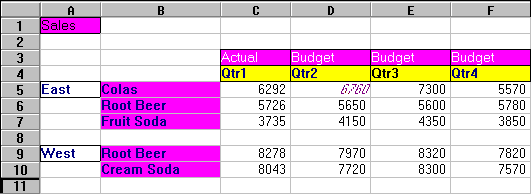
Cell D5 (the cell you just attached the linked file to) is now displayed in
purple, italic font. Hyperion Essbase also refreshes the worksheet with
the other options set in the Essbase Options dialog box.
Figure 145. Result of Applying a Style to a Linked Reporting Object Cell
- Leave the Asymm.xls file open for the next tutorial task.
In addition to linking external files to a data cell in Hyperion Essbase
Spreadsheet Add-in, you can also link individual cell notes that contain
information on particular data cells. Cell notes can have no more than
599 characters. If you need to link information to a data cell that is
longer than 599 characters, you need to create and save an external file and
then link the file to the data cell.
To link a cell note to a data cell:
- In the Asymm.xls file, select cell C5.
| Note: | You can link objects only to data cells, not to cells containing member
names.
|
- Select Essbase > Linked Objects.
Hyperion Essbase displays the Linked Objects Browser dialog
box.
- In the Linked Objects Browser dialog box, click
Attach.
Hyperion Essbase displays the Attach Linked Object dialog
box.
- Under the Attachment Type option group, select Cell
Note.
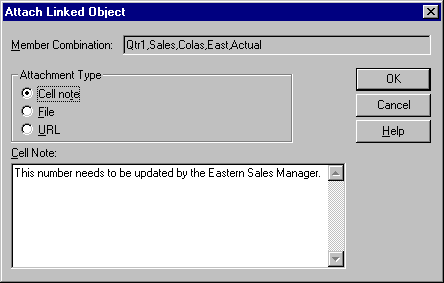
- In the Cell Note box, type the note as indicated in the
following illustration:
Figure 146. Creating a Cell Note to Link
- To close the dialog box and link the cell note, click OK.
Hyperion Essbase copies the note to the server and establishes a link to
the current data cell.
- To close the Linked Objects Browser dialog box, click
Close.
- Select Essbase > Retrieve to refresh the worksheet and apply the style you
defined for linked objects.
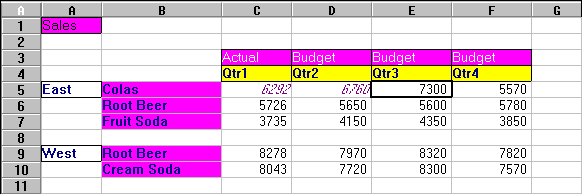
Now Hyperion Essbase displays two data cells (C5 and D5) in purple, italic
font to represent a cell that contains a linked reporting object.
Figure 147. Result of Creating a Linked Cell Note
- Leave the Asymm.xls file open for the next tutorial task.
A URL is an address string that identifies resources on
the World Wide Web, such as documents, images, and downloadable files.
With the linked reporting objects feature, you can link a URL to a data cell
so that users who have access to the database can link directly to the
specified URL. When you access the cell from Hyperion Essbase
Spreadsheet Add-in, your default Web browser opens and displays the specified
URL.
| Note: | For more information on URL syntax, see the Hyperion Essbase Spreadsheet
Add-in online help.
|
If you have a Web browser and Internet access, follow these steps to link a
data cell to the Hyperion Web site:
- In the Asymm.xls file, select cell E5.
| Note: | You can link objects only to data cells, not to cells containing member
names.
|
Figure 148. Selecting a Data Cell for Linking to a URL
- Select Essbase > Linked Objects.
Hyperion Essbase displays the Linked Objects Browser dialog
box.
- In the Linked Objects Browser dialog box, click Attach.
Hyperion Essbase displays the Attach Linked Object dialog
box.
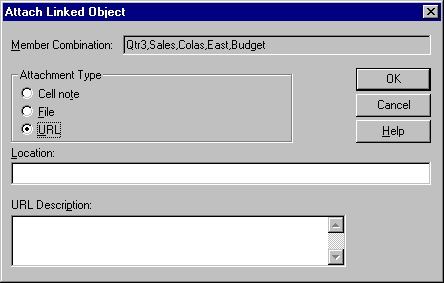
- Under the Attachment Type option group, select URL.
Figure 149. Linking a URL to a Data Cell
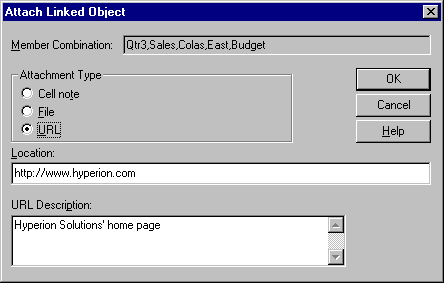
- Enter a URL in the Location text box and a brief description in
the URL Description text box, as indicated in Figure 152.
Figure 150. Entering and Describing a URL to Link
| Note: | Entering text in the URL Description text box is optional. The text
field for entering the URL location is limited to 512 characters. The
text field for entering the URL description is limited to 80
characters.
|
- To close the dialog box and link the URL to the cell, click OK.
Hyperion Essbase copies the URL string to the server and establishes a link
to the current data cell.
| Note: | The syntax for the URL is not checked at creation time; Hyperion Essbase
checks the syntax when the user accesses the URL from the worksheet.
The default Web browser checks for the existence (or validity) of the
URL.
|
- To close the Linked Objects Browser dialog box, click
Close.
- Select Essbase > Retrieve to refresh the worksheet and apply the style
that you defined for linked objects.
- Leave the Asymm.xls file open for the next tutorial
task.
Now that you have learned to create linked reporting objects, you are ready
to learn how to access them from Hyperion Essbase Spreadsheet Add-in.
You have two options for accessing and editing a linked reporting object
that is attached to a data cell:
- Select the cell (as identified by the style applied to it) and select
Essbase > Linked Objects.
- Enable double-clicking for linked object browsing.
| Note: | If you enable double-clicking for linked object browsing, double-clicking
behavior changes for retrieving data and performing drill actions. For
more information on these changes, see the Hyperion Essbase Spreadsheet Add-in
online help.
|
For this tutorial, you access the linked reporting objects that you created
in the previous sections by using the Essbase menu item instead of the
double-clicking action.
Sometimes you want to check an external file that is linked
to a data cell.
To access the external file that you previously linked to a data
cell:
- In the Asymm.xls file, select cell D5.
- Select Essbase > Linked Objects.
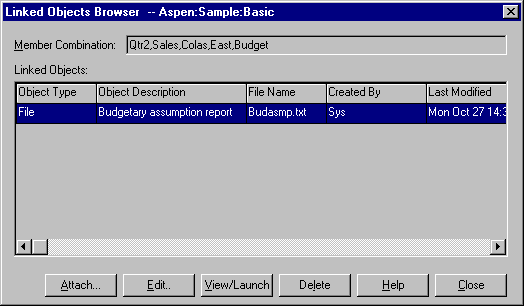
- In the Linked Objects Browser dialog box, select the
Budasmp.txt file.
Figure 151. Accessing a Linked External File
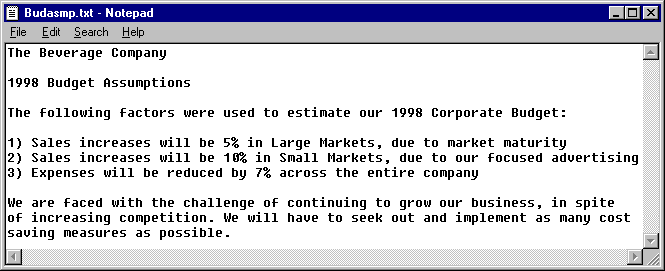
- To view the linked file, click View/Launch.
The Budasmp.txt file is opened from the source
application.
Figure 152. Viewing the Contents of a Linked External File
| Note: | Edit the contents of a file in the source application. After the edits
are made and the file saved, you can re-attach the edited file by clicking the
Edit button in the Linked Objects Browser dialog box. Hyperion Essbase
displays the Re-attach Linked Object dialog box, which you can use to
re-attach, or relink, the edited file to the data cell. For more
information, see the Hyperion Essbase Spreadsheet Add-in online help.
|
- Close the Budasmp.txt file and click Close to close the
Linked Objects Browser dialog box.
- Leave the Asymm.xls file open for the next task.
Sometimes you have to edit a cell note that was previously
created.
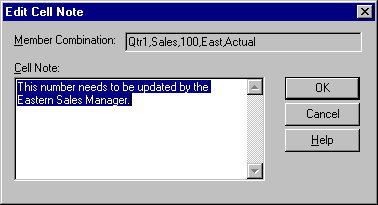
To access and edit the cell note that you previously created:
- In the Asymm.xls file, select cell C5.
- Select Essbase > Linked Objects.
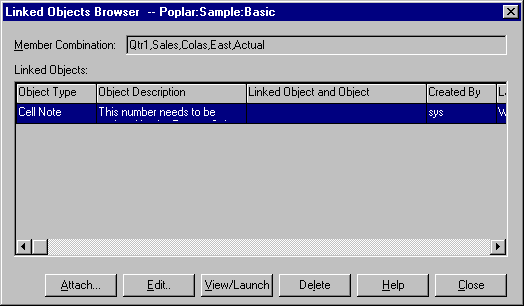
The Linked Objects Browser dialog box displays the cell note
that is linked to the selected data cell.
- In the Linked Objects Browser dialog box, select the cell
note.
Figure 153. Accessing a Linked Cell Note
- To edit the contents of the cell note, click Edit.
Hyperion Essbase displays the Edit Cell Note dialog box with the
selected cell note displayed.
Figure 154. Editing the Contents of a Linked Cell Note
| Note: | If you simply want to view the contents of the cell note, click the
View/Launch button instead of the Edit button in the Linked Objects
Browser dialog box.
|
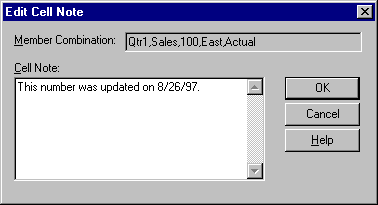
- Edit the contents of the cell note as indicated in the following
illustration:
Figure 155. Result of Editing Cell Note Contents
- Click OK to close the Edit Cell Note dialog box and save the
edits you made to the note.
Hyperion Essbase saves the edits to the cell note on the server.
- To close the Linked Objects Browser dialog box, click
Close.
- Leave the Asymm.xls file open for the next tutorial
task.
If you followed the steps in Linking a URL to a Data Cell, you can access and edit the URL that you
created.
To access the URL:
- In the Asymm.xls file, select cell E5.
- Select Essbase > Linked Objects.
The Linked Objects Browser dialog box displays the URL that is
linked to the selected data cell.
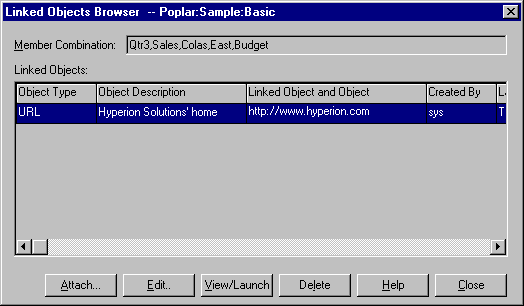
- In the Linked Objects Browser dialog box, select the
URL.
Figure 156. Accessing a Linked URL
- To view the linked URL, click View/Launch.
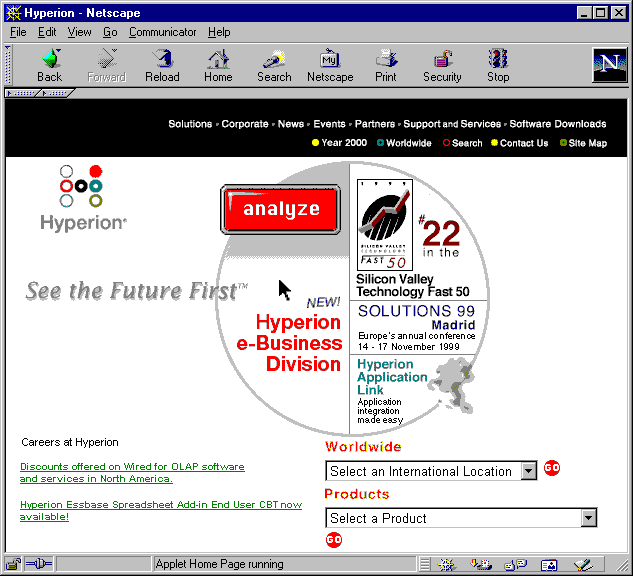
Hyperion Essbase checks the syntax of the URL. If there are syntax
errors, Hyperion Essbase displays an error message. If the URL syntax
is correct, the default Web browser launches and connects to the specified
site. In this case, the syntax for the URL is correct, so the default
Web browser launches and connects to the Hyperion Web site.
Figure 157. Viewing a Linked URL
- Close the Web browser.
To edit the URL:
- In the Linked Objects Browser dialog box, select the
URL.
- To edit the linked URL, click Edit.
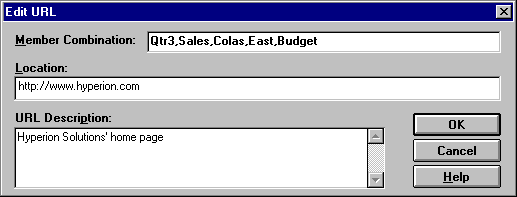
Hyperion Essbase displays the Edit URL dialog box with the
selected URL displayed.
Figure 158. Preparing to Edit the Contents of a Linked URL
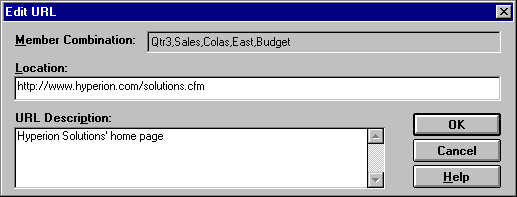
- Edit the URL location and description as show in the following
illustration:
Figure 159. Editing the Contents of a Linked URL
- To close the Edit URL dialog box and save the edits that you
made, click OK.
Hyperion Essbase saves the edits to the URL on the server.
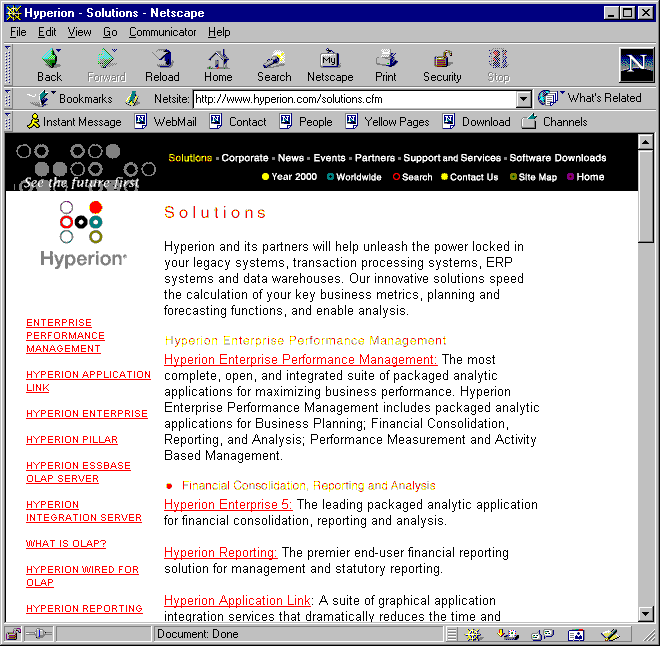
- To view the new URL, click View/Launch.
The Web browser launches and connects to the new URL.
Figure 160. Viewing an Edited URL
- Close the Web browser.
- To close the Linked Objects Browser dialog box, click
Close.
- Close the Asymm.xls file without saving it.
[ Top of Page | Previous Page | Next Page ]
