This document describes how to install and use the Information
Center and the PDFs that the SAN Volume Controller installation program
creates on your hard drive.
About this task
This document describes using both the web installer and
the DVD-based installer program. The first few steps are for using
the web installer only.
Procedure
To install the SAN Volume Controller Information Center
on your workstation, complete these steps:
- Web-installer only: Click the web installation program
for SAN Volume Controller to open a download panel.
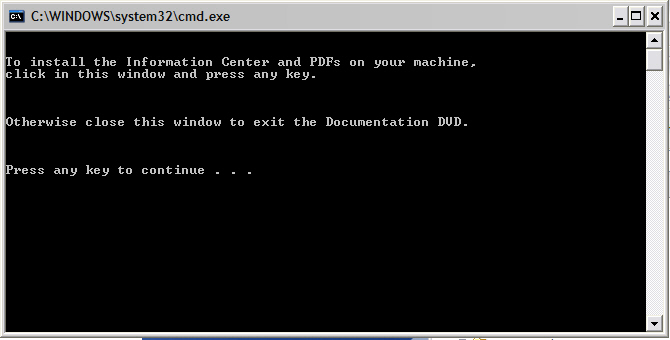
- DVD-installer only: When installing from the DVD,
a command window opens, where you must click within the command window and press
a key to start the installer:
- Read and accept the license terms to continue, then click Next.
- When the Installation utility opens the Introduction panel,
click Next to continue.
- Choose an installation location; then click Next.
- Review the selections you have made on the Pre-Installation
Summary panel, then click Install.
The SAN Volume Controller Information Center requires
over 2 GB of data space on your hard disk. The space required is for
the IBM User Interface Help System built on Eclipse, translations,
and previous versions of Information Centers and eLearning.
- As the installation proceeds, you can monitor the installation
of various components of the Information Center, as well as the PDFs,
at the bottom of the Installing SAN Volume Controller 6.4
IC panel.
A progress bar at the bottom of the window indicates the
progress of the installation. The PDFs are installed in the PDFs folder
in the installation root directory.
An uninstall program is
created and provided as a menu selection on the Windows Start menu.
The InstallAnywhere program names the uninstaller Change
SAN Volume Controller 6.4 IC installation.exe. The uninstaller
is the last component to install.
A successful completion is
indicated on the Installation Complete panel after all the code is
installed.
- Click Done on the Installation
Program window to close the program.
- Click to access the options.
- Verify that the installation is complete by viewing the
Information Center entries in the Windows Start menu
list of programs.
The
Start menu
has options for
SAN Volume Controller 6.4 IC to
perform the following tasks:
- SAN Volume Controller 6.4 IC
- Launch shared Information Center
- Launch stand-alone Information Center
- Stop shared Information Center
- Stop stand-alone Information Center
- Uninstall the Information Center
- View a SAN Volume Controller PDF
Whenever you start the Information Center, Eclipse performs
many processes at startup that it does not need to perform later,
as it runs. You’ll notice a processor spike in your performance monitor
as it starts. From the time it begins to the completion of the starting
phase can take as long as 8 minutes on slower machines. You can tweak
some of the memory parameters to match your server’s capabilities.
In particular, edit the IC_start.exe or IC_restart.exe command scripts
and change these values if you want to tune performance:
-Xms256m -Xmx256m -XX:PermSize=64m -XX:MaxPermSize=128m
Try
increasing the value of -Xmx until a failure to create the Java virtual
machine occurs at startup. Then back off the amount of memory until
the Java virtual machine starts. This memory is related to the machine’s
total RAM, but is a subset of contiguous, available virtual memory
that is always much less than the total RAM amount.
Two ways
of running and accessing the SAN Volume Controller Information Center
exist:
- Stand-alone mode is ideal for a laptop and personal use. A personal-use
only Information Center opens automatically.
- Information Center mode, which is referred to as shared mode in
this document and in the Windows Start menu,
does not open an Information Center automatically. You must open a
browser window to point to the URL of the new Information Center.
Information Center mode is ideal for a server that everyone
in a company might access. The SAN Volume Controller Information Center
has more information about each mode, in this plug-in: Tips
and techniques: Limit search results to a specific release.
Stand-alone
mode opens the SAN Volume Controller Information Center automatically
in a browser window by using a loopback port and web address.
Access
the shared-mode Information Center by entering the web address of
the Information Center into a browser window. The default for the
SAN Volume Controller Information Center is this address:
http://server_name_or_IP:9999/help/index.jsp
The
port is 9999, which a later step shows how to change, if necessary.
You
can view the PDFs directly without going through the Start menu by
changing directories to the PDFs directory in the installation root
directory and clicking the start.html file.
The
page that opens when you select this option to view a PDF is a simple
HTML page that is not part of the Information Center. Simply close
the page when you are done.
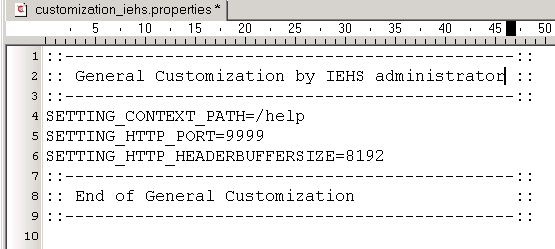
- You can start the Information Center immediately on port
9999, or you can change the port to a port that works for your workstation.
To edit the port, open the installation_root_directory\SAN
Volume Controller 6.4 IC\IBMSVCIC\customization_iehs.properties file
in a flat file editor. Change the port from 9999 to
a port that works for your workstation or server.
- Search for 9999 to change the port
to a value that works for your organization and save the file.
- Double-click the IC_start.bat command
file directly to start the SAN Volume Controller Information Center,
or select the shared Information Center from the Start menu.
To stop the Information Center, double-click the IC_end.bat command
file directly or stop the shared Information Center from the Start menu.
Anyone
who can access the server or workstation by its IP address or fully
qualified DNS name can access the Information Center at the http://server_name_or_IP:9999/help/index.jsp web
address.
- If you change the port number, access the information center
as described in the Tips and techniques: Limit search results
to a specific release documentation:
- Open the browser in which you want to run the information
center.
- Enter the following syntax as the web address:
http://server_name_where_you_installed:port/help
server_name_where_you_installed represents
the name of the host or IP address of the system where the Information
Center is installed.
port represents the
port that the information center uses, which is either 9999 or a port
that you choose.
For example, if you installed the Information
Center on serverabc, using port 3737, your URL
is: http://serverabc:3737/help
- After typing the web address in the browser, press Enter to
access the Information Center.
- Anyone who has access to your server can access the
Information Center at that address.
- After the Information Center starts, you can find more
information about stopping, starting, and using the Information Center
in the information container that is labeled Tips and techniques: Limit search
results to a specific release.
Set the search
scope to drop out of sight and drop from the search results all but
your own version of the SAN Volume Controller product information.
This handy function is well worth the time it takes to learn how to
use it.
Other topics in the
Tips and techniques:
Limit search results to a specific release plug-in describe
these items:
- Starting and stopping the help system in stand-alone mode, which
is how you might do it when you want to run the Information Center
just for yourself
- Starting and stopping the help system in information-center mode,
which is how you do it on a server that you want many people to be
able to access
- Navigating in the help system
- Searching in the help system (including setting the scope)
- Printing in the help system
- Accessibility and keyboard shortcuts in the help system
- The IBM User Interface Help System runs under an Eclipse javaw instance.
When you stop the shared Information Center, the Eclipse instance
is ended.
Sometimes, Eclipse leaves a javaw instance
running after you end it from the Start menu.
Troubleshoting tip: If you stop an Information
Center instance, then later, cannot start the Information Center in
a new instance, the reason is probably that the original javaw instance
never ended.
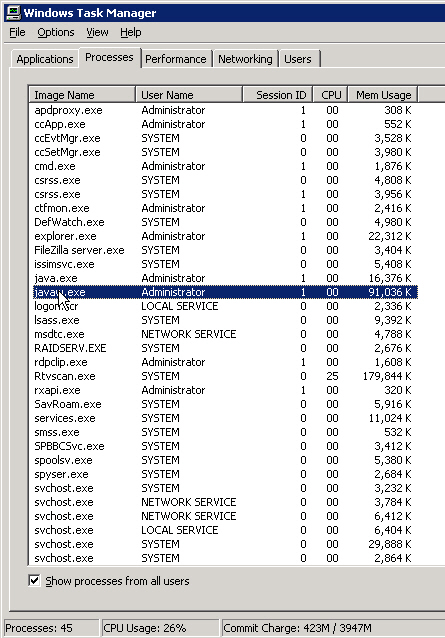
If you have a stubborn javaw instance, open the Task
Manager with Ctrl-Alt-Delete to view running processes. Sort the processes
alphabetically and select a javaw instance to stop. Right-click to
select properties to verify that the task you
are stopping is your runaway javaw instance and not another program.
You can always restart any Java programs that you inadvertently shut
down.
- Uninstall the Information Center by clicking Uninstall
the Information Center from the Windows Start menu,
if necessary, such as before installing the Information Center in
a new location.
What to do next
Enjoy your own SAN Volume Controller Information Center!