IBM WebSphere Studio 5.0.1 Technology Previews
Installation instructions
This document describes how to install one or more of the IBM WebSphere Studio 5.0.1 Technology Previews.
These Technology Previews are available for Windows installations of
Installation is performed through the update manager capability built into the product. You also have the option of
downloading a ZIP file that you can install locally from your machine. The following table shows which products the Technology Previews are compatible
with:
Note: There are known issues that may result in problems during or after applying the PTF.
To ensure proper installation:
- Follow the instructions below carefully.
- If you have disabled any plug-ins either through the update manager or by modifying plugin.xml files, re-enable them prior to installation.
All screen captures in this document are taken from a WebSphere Studio Application Developer installation. Screens may differ slightly if you are using
WebSphere Studio Site Developer and WebSphere Application Server - Express.
It is recommended that you install directly from the IBM server, but a downloadable version of the fix is available for users who meet the following criteria:
- Have slow or unstable Internet connections and would like use a download manager with resume capability
- Have trouble accessing the live IBM server from behind firewalls
- Would rather download the fixes and install at a later time
- Are site administrators for a group of developers who do not have direct access to the Internet
studio_technology_previews.zip (18 MB)
Once you have downloaded the file, unzip it to a directory and see tp501/install.html for install instructions.
- Log on to your system with a user ID that has write access to the install location and start WebSphere Studio 5.0.1.
(This is typically an ID with Administrator authority on Windows, and root authority on Linux).
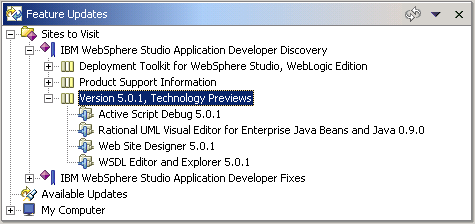
- Goto the Update Manager perspective (Help > Software Updates > Update Manager) and navigate the Sites To Visit section.
The Technology previews can be found on the WebSphere Studio Discovery site.

- Select the Technology Preview you would like to install. The Preview view shows information about the selected Technology Preview. You can
click More Info to view additional information. Click Install to begin the Installation.
- An Install Wizard will be shown. Click Next.
- Once you have read and accepted the license, click Next.
- The final page of the Install Wizard will confirm the Install Location. Click Finish to continue.
Attention: Do not modify the default selection as this may result in errors.
- If you are warned that you are about to install an unsigned feature, click Install to continue.
This warning will not cause problems during installation.
- When the installation is complete you will be asked to restart the product. If you wish to install another Technology Preview click No and
repeat steps 3 - 7 for the next Technology Preview. Click Yes when you are ready to restart the product.
Note: This action will not reboot your machine.
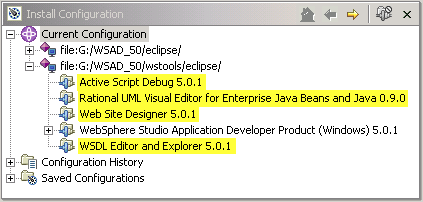
- To verify that the installation was successful, switch to the Install/Update Perspective
(select Help > Software Updates > Update Manager) and from the Install Configuration view, verify that the Technology Previews
that you chose are shown.

- Your installation is now complete.
© Copyright International Business Machines Corporation, 2000,
2003.
All rights reserved.


