Topic  -
NoteView: Creating the application profile
To create a new application profile follow these steps:
-
Click File > ZipPrint > Customize Profiles.
-
In the Customize Application Profile window, click New.
-
In the New Profile Name window, type NoteView and click OK.
The image below shows the New Profile Name window:

When you click OK, Host On-Demand creates a new ZipPrint application profile.
-
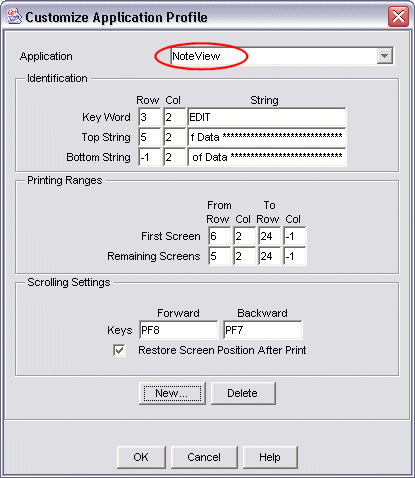
The first image below shows
the new NoteView application profile
as it could appear immediately after you create it.
-
The Application listbox at the top of the window shows the name of the new
application profile, NoteView.
-
But where did the other parameters come from?
For example, in the Identification
group, the Key Word parameter has a row value of 3, a column value of 2,
and a string value of EDIT.
-
These other parameters are from the ISPF sample profile.
When you click New to create a new application profile,
Host On-Demand initializes the new application profile
with the values of whatever profile was selected when
you clicked New.
-
In this case, the ISPF sample profile was selected when New was clicked to create
the NoteView application profile.
Therefore Host On-Demand initialized the NoteView profile with the
values from the ISPF sample profile.
-
However, for purposes of illustration,
this tutorial uses a NoteView sample profile
with the parameters set to default values.
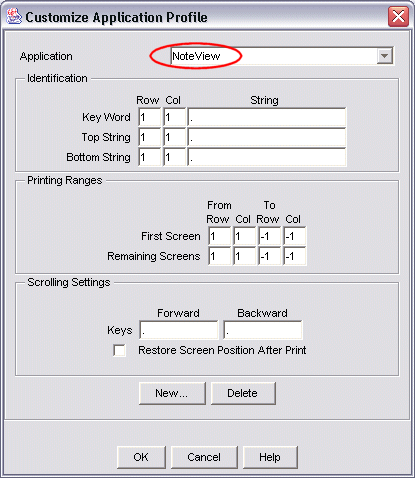
The second image below shows the NoteView sample profile
with the parameters initialized to default values.
1. NoteView application profile with the initial parameters
set to the values from the profile
that was selected when the user clicked New (the ISPF profile):
2. NoteView application profile with the parameters initialized to default values.


