Installing
DB2 OLAP Server Deployment Services V8.2
or
DB2 OLAP Server Spreadsheet Services V8.2
without installing Apache Tomcat
automatically
If you are planning to deploy DB2 OLAP Server Deployment Services or DB2 OLAP Server Spreadsheet Services on an application server other than Apache Tomcat you must follow the instructions below. A Typical Install will always install Apache Tomcat in the HYPERION_HOME directory. Only a Custom Install gives you the option to NOT install Tomcat as an application server during the DB2 OLAP Server Deployment Services and DB2 OLAP Server Spreadsheet Services installation process.
The instructions below assume that you selected C:\ibm as HYPERION_HOME and C:\ibm as the directory where DB2 OLAP Server Deployment Services and DB2 OLAP Server Spreadsheet Services are being installed in.
DB2 OLAP Server
Deployment Services (EDS) Installation
- Launch the installation program and follow the instructions until you are being prompted to choose between a “Typical Install” and a “Custom Install”
- Choose “Custom install”
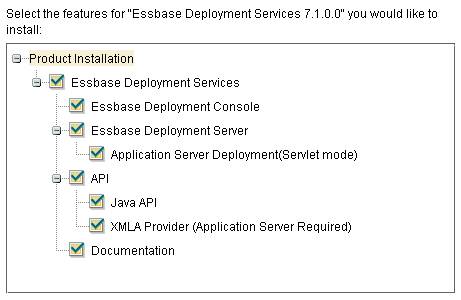
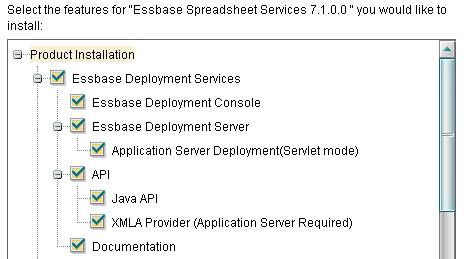
- Uncheck the
·
Application
Server Deployment(Servlet mode)
·
XMLA Provider
(Application Server Required)
boxes, when the panel shown below is being displayed:
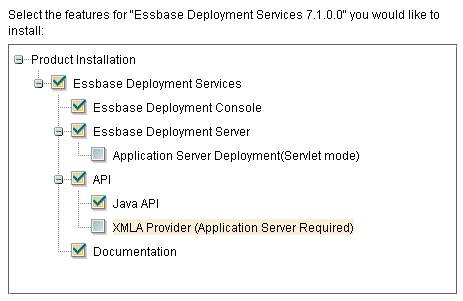
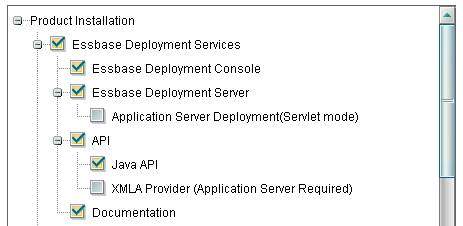
- The panel should now look like this:
- Continue to the next installation panel and finish the installation. You should not be prompted to enter port values for Apache Tomcat.
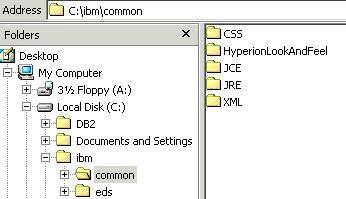
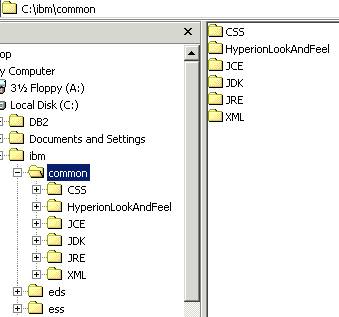
- After the installation program has completed, you should not be able to locate a directory called “common\AppServer” in the directory that you specified as HYPERION_HOME:
- You can now manually deploy the DB2 OLAP Server Deployment Services web archive file eds.war, located in C:\ibm\eds\7.1.0.0\redist\. Follow the steps outlined in section “Deploying Deployment Services on Application Servers” in chapter 4 (Advanced Installation Topics) of the ESSBASE Deployment Services Installation Guide to complete the installation process.
DB2 OLAP Server Spreadsheet
Services (ESS) Installation
- Launch the installation program and follow the instructions until you are being prompted to choose between a “Typical Install” and a “Custom Install”
- Choose “Custom install”. The DB2 OLAP Server Spreadsheet Services installation program can be used to install both components, EDS and ESS, at the same time. If you do not wish to install Deployment Services during the Spreadsheet Services installation, uncheck the Essbase Deployment Services box:
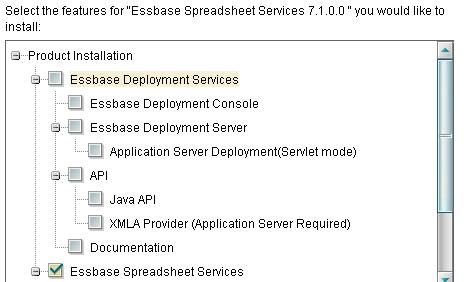
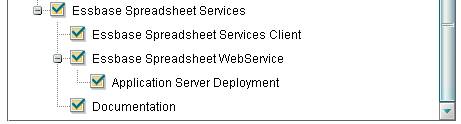
- Uncheck these boxes listed (if they are checked)
·
Application
Server Deployment(Servlet mode)
·
XMLA Provider
(Application Server Required)
·
Application
Server Deployment
when the panel shown below is being displayed:
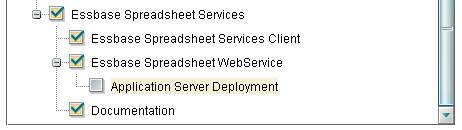
- The panel should now look like this:
- Continue to the next installation panel and finish the installation. You should not be prompted to enter port values for Apache Tomcat.
- After the installation program has completed, you should not be able to locate a directory called “common\AppServer” in the directory that you specified as HYPERION_HOME:
- You can now manually deploy the DB2 OLAP Server Spreadsheet Services web archive ess_webservice.war, located in C:\ibm\ess\7.1.0.0\redist\. Follow the steps outlined in section “Deploying Spreadsheet Services on Application Servers” in chapter 2 (Advanced Installation Topics) of the ESSBASE Spreadsheet Services Installation Guide.