Quick Beginnings
To install a DB2 client for OS/2, perform the following steps:
Step 1.
| Insert the appropriate CD-ROM into the drive.
|
Step 2.
| Open an OS/2 command window, set the directory to your CD-ROM drive, and
enter the following command:
x:\install
where x represents your CD-ROM drive.
|
Step 3.
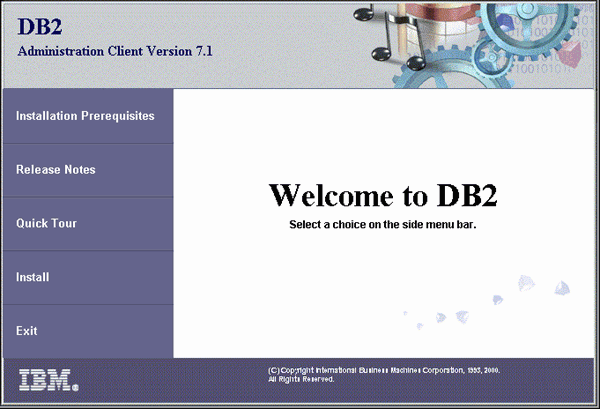
| The DB2 Launchpad opens. It looks similar to the following:

|
Step 4.
| From this window, you can view the installation prerequisites and the
release notes, you can take a Quick Tour to explore the features,
capabilities, and benefits of DB2 Universal Database Version 7, or you can
proceed directly to the installation.
|
Once you have initiated the installation, proceed by following the install
program's prompts. Online help is available to guide you through
the remaining steps. To invoke the online help, click Help,
or press F1.

| For information on errors encountered during installation, see the
l1.log and l2.log files. These
files store general information and error messages resulting from installation
and uninstall activities. By default, these files are located in the
x:\db2log directory; where x: represents the drive
on which your operating system is installed.
For more information, refer to the Troubleshooting
Guide.
|
If you want to use ODBC applications with OS/2, you must ensure that the
\sqllib\dll\odbc.dll file appears as the first
odbc.dll in the LIBPATH parameter of the
config.sys file. The Install program does not
automatically position the dynamic link library (dll) as of Version 7.
If odbc.dll is not the first ODBC dll listed, you may have
problems connecting to DB2 through ODBC applications.
[ Top of Page | Previous Page | Next Page ]


